Changeover in 15 Minutes: Quick-Tooling Secrets for Tube Manufacturing Machinery Operators
Are you constantly battling production delays caused by lengthy tooling changeovers? This frustrating downtime eats into your profits and makes it incredibly difficult to respond to urgent, varied client orders. Imagine transforming this bottleneck into a seamless, 15-minute tooling changeover process1, boosting both efficiency and profitability.
Achieving a sub-15-minute tooling changeover is a systematic process, not a rushed job. It hinges on a trifecta of meticulous preparation, streamlined workflow execution, and the use of machinery engineered for rapid adjustments. The goal is to have new tools installed, calibrated, and running with minimal disruption.
I've spent over 15 years in this industry, and I’ve seen how a single, inefficient process can cascade into major operational headaches. The difference between a thriving tube producer and one that struggles often comes down to their mastery of these crucial, time-sensitive tasks. This guide isn't just theory; it’s a collection of proven strategies from the factory floor.
The pursuit of speed can never come at the expense of precision. While a 15-minute target is aggressive, it’s achievable without compromising quality. The secret lies in adopting a holistic philosophy where quick-change features on machinery2, like our XZS lines, are supported by an equally efficient operator workflow. It's a symbiotic relationship between advanced automation, like PLC-controlled setups that pre-load parameters, and the skilled technician who executes the physical swap. This approach moves beyond simply working faster; it’s about working smarter, eliminating wasted motion, and ensuring the first tube off the new line meets spec every single time.
What preparations are necessary before starting a quick tooling changeover?
Is your team scrambling for tools and specifications moments before a changeover begins? This disorganized rush inevitably leads to extended downtime, frustration, and costly mistakes. A structured preparation protocol transforms this chaos into a calm, efficient, and predictable evolution, setting the stage for success.
To prepare for a quick tooling changeover, operators must pre-stage the correct, cleaned toolset and all necessary hand tools. They should also review the new job's parameters, clean the machine's mounting surfaces, and complete a safety checklist for changeover procedures. This systematic preparation eliminates guesswork and delays.
Think of a Formula 1 pit stop. The lightning-fast tire change is a result of immense preparation that happens long before the car even enters the pit lane. Every tool is laid out, every team member knows their exact role, and the process is choreographed down to the millisecond. We must bring this same "pit-stop mentality" to the factory floor. I remember working with a client in the automotive sector, a producer of exhaust components, who initially took nearly two hours for each changeover. Their primary issue wasn't the machine's capability but a complete lack of a pre-changeover ritual. By helping them develop a simple but rigid preparation checklist, we cut their average changeover time by over 70% in the first month. This isn't about massive investment; it’s about a disciplined approach. The moments before you stop the line are just as critical as the moments you're working on the machine itself. This preparation phase is the foundation upon which a 15-minute changeover is built. Without it, you are simply reacting to problems as they arise, which is the slowest way to work.
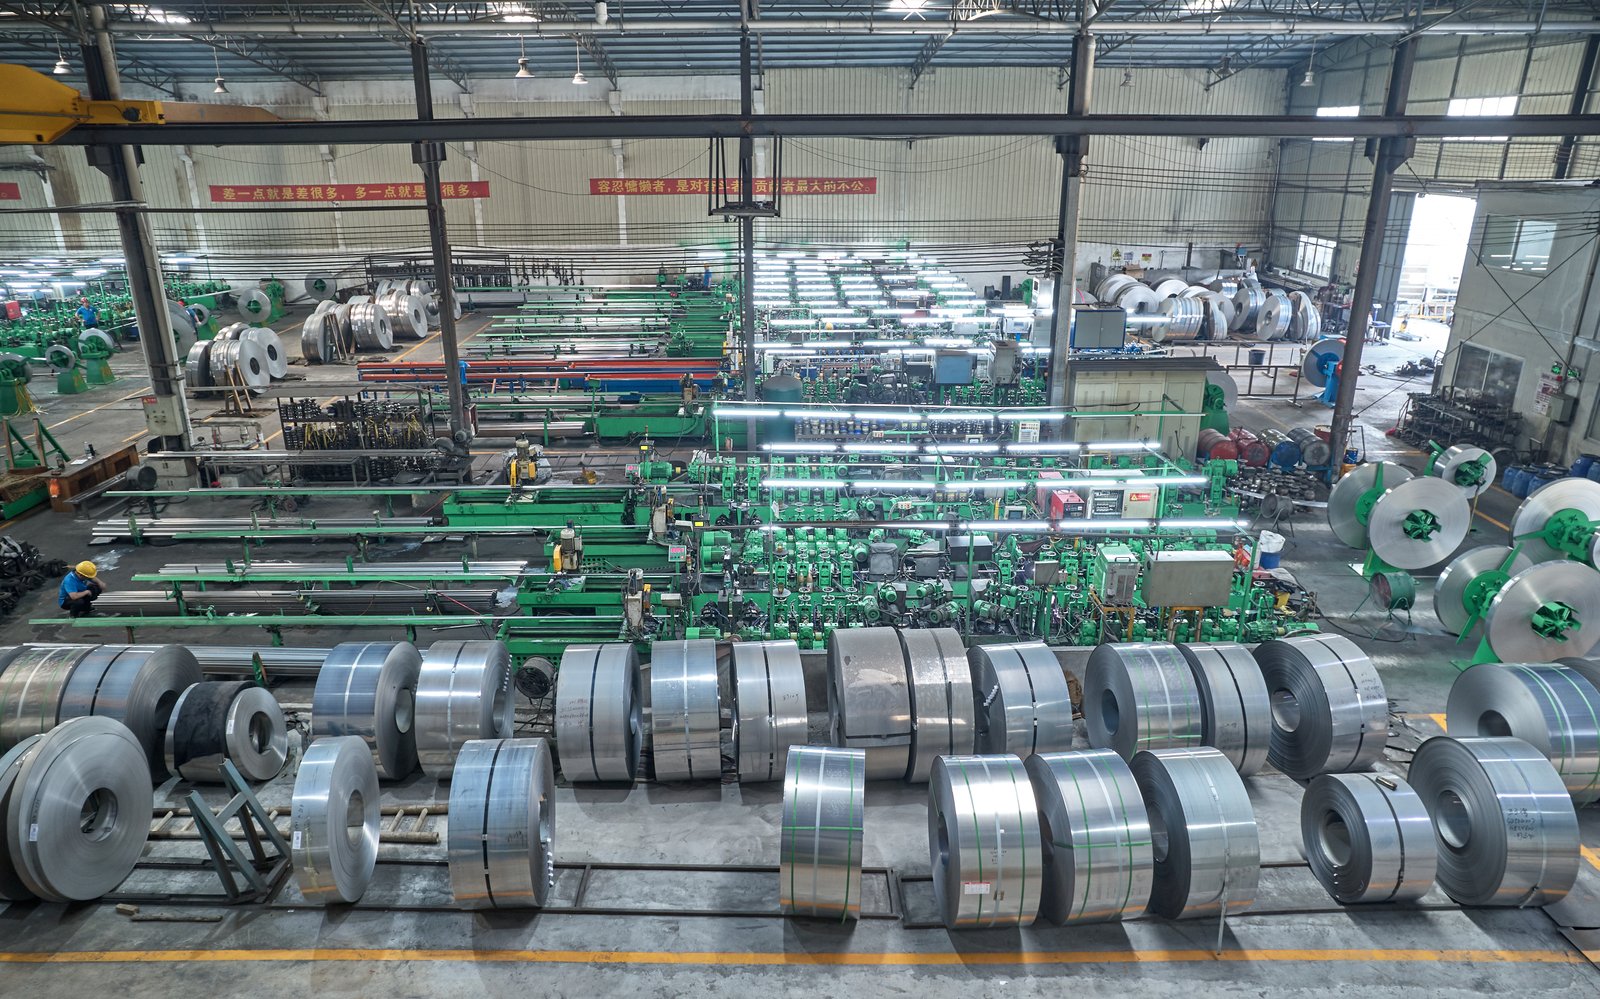
The difference between an average operator and an elite one often boils down to what they do before the work begins. A reactive approach, where problems are solved as they appear, is a recipe for inefficiency. A proactive, prepared approach, however, turns a complex task into a routine procedure. It’s about controlling the variables you can, so you have the mental and physical capacity to handle the ones you can't. This mindset shift is crucial for any team aiming for peak operational efficiency in tube manufacturing. The following steps detail how to build a rock-solid preparation strategy that makes a 15-minute changeover not just possible, but repeatable.
The 'Mise en Place' Strategy for Tooling
The French culinary term 'mise en place' means 'everything in its place'. Chefs use this principle to ensure all ingredients are prepped and organized before cooking begins. Applying this to a tube mill changeover is transformative. It means that before the machine is powered down, the complete set of new rollers, spacers, and fixtures are not just pulled from storage, but are cleaned, inspected for wear, and arranged sequentially on a dedicated, mobile tool cart. This cart becomes the operator's sterile, organized workstation.
This goes beyond just having the tools nearby. It involves a meticulous pre-flight check. Each roller should be clearly labeled with its corresponding stand number. All necessary wrenches, feeler gauges, micrometers, and cleaning supplies should be present on the cart. This eliminates the time-wasting "scavenger hunts" that plague so many factory floors. I once visited a furniture manufacturer in Brazil who implemented a color-coded system for their tooling carts—a red cart for 25mm round tubes, a blue cart for 40mm square tubes, and so on. This simple visual cue drastically reduced the chance of grabbing the wrong component, a seemingly small error that could previously cost them 30 minutes of rework.
By adopting this philosophy, the changeover process begins from a state of complete readiness. The operator isn't making decisions on the fly; they are executing a well-rehearsed plan. The focus shifts from "What do I need next?" to "I am now executing step one." This mental shift alone reduces cognitive load and minimizes the potential for error, paving the way for a faster, smoother transition between production runs.
Integrating a Digital Pre-Changeover Workflow
In a modern smart factory, preparation is not just physical; it's digital. Our XZS production lines are equipped with PLC and touch-screen controls for automated setup that can store hundreds of tooling recipes. An essential preparation step is for the operator to select the next job's recipe on the HMI before the current run is finished. This pre-loads all the specific settings, such as roller pressures and welding parameters, into the system. When the time comes, the change is confirmed with a single touch, eliminating manual data entry, which is both time-consuming and prone to typos.
To support this, many of our clients are equipping their operators with ruggedized tablets right at the workstation. These devices display a digital, interactive checklist for the specific changeover required. Instead of a laminated paper sheet that gets greasy and outdated, the operator sees a step-by-step guide with visual aids, required torque values, and safety warnings. They can tick off each step as it's completed, creating a digital record of the changeover. This ensures consistency, even with less experienced operators, and provides valuable data for process improvement.
The impact of such digital tools is well-documented. A report from the MPI Group highlighted that manufacturing plants using digital work instructions and real-time data vement in overall equipment effectiveness (OEE). For a tube producer, this translates directly to less scrap, faster changeovers, and higher profitability.
The Critical Role of a Safety and Area Readiness Review
Safety is paramount, but it is also an integral component of speed. A safe work area is an efficient work area. The most significant delays are always caused by accidents or near-misses. Therefore, a non-negotiable part of preparation is a thorough safety and area readiness review. This begins with a proper lockout/tagout (LOTO) procedure3, ensuring the machine is completely de-energized before anyone places their hands on the tooling.
The review extends to the immediate environment. The floor around the tube mill should be clean and free of oil, water, or stray equipment to prevent slips and falls. Adequate lighting is essential for the operator to see clearly and work precisely. All guards must be in place and functioning correctly before the line is stopped, and the operator must be wearing the appropriate Personal Protective Equipment (PPE), including gloves and safety glasses.
This proactive approach to safety and cleanliness stands in stark contrast to a reactive one. A team that prepares its workspace properly can move with confidence and purpose. A team that doesn't is forced to work cautiously and hesitantly, constantly navigating preventable hazards. The small investment of time in these pre-changeover checks pays massive dividends in both safety and speed.
| Aspect | Reactive Approach (Inefficient) | Proactive Preparation (Efficient) |
|---|---|---|
| Tool Staging | Tools are located after production stops. | A pre-staged, dedicated tool cart is ready. |
| Parameter Input | Settings are manually entered during downtime. | The next job's recipe is pre-loaded via the PLC. |
| Workspace | Area is cleaned 'as needed', often poorly. | Area is cleaned and cleared as a final prep step. |
| Safety | LOTO is viewed as a time-consuming formality. | LOTO and safety checks are an integrated first step. |
| Typical Time | 60+ minutes | < 15 minutes |
How to dismantle existing tools efficiently without affecting production time?
The line is stopped, and the clock is ticking. A clumsy, disorganized dismantling process can turn a quick changeover into a lengthy ordeal. Fumbling with stuck rollers or misplacing components adds precious minutes of downtime, directly impacting your output and profitability.
Efficiently dismantling existing tools requires a systematic, reverse-order approach. Loosen all roller stands before fully removing any single one to release tension evenly. Place used tools directly onto a designated cart for later inspection, ensuring the work area remains clear and organized best practices for lean manufacturing tool changeovers.
Dismantling should be as choreographed as the installation. It’s not about ripping out the old parts as fast as possible; it’s about a methodical process that preserves the condition of the tooling, protects the machine from damage, and sets the stage for a smooth installation of the new set. When I was starting my career, I saw an operator use a sledgehammer to dislodge a "stuck" forming roller. Not only did he damage a very expensive component, but the shock also misaligned the entire stand, adding hours of repair time to the changeover. This taught me a vital lesson: force is the enemy of efficiency. A well-maintained machine with a trained operator should not require excessive force. The key is to work with the machine, not against it. This means releasing tension systematically across the line before attempting to remove individual components. It's a process of finesse, not brute strength, and it's fundamental to protecting both your equipment and your production schedule. This methodical approach ensures that you're not creating new problems while trying to solve the current one importance of proper machine maintenance and operator training in industrial settings4.

The dismantling phase of a tooling changeover is often underestimated. Operators can be so focused on getting the new tools in that they rush the removal of the old set, leading to errors, damage, and disorganization. However, a disciplined and efficient dismantling process is a critical enabler of the 15-minute target. It ensures the machine is ready to accept the new tooling without issue and maintains the integrity of the components coming off the line. This phase is defined by three core principles: systematic tension release, organized component handling, and immediate post-removal inspection. Mastering these steps transforms dismantling from a chaotic teardown into a precise, value-adding procedure SMED ("Single-Minute Exchange of Die") methodology for fast and efficient changeovers5.
The Principle of Systematic Tension Release
A tube mill is a system under tension. The forming and sizing rollers apply significant pressure to shape the steel. Simply trying to remove the first roller in the line is counterproductive, as it remains under pressure from the subsequent stands. The most efficient method is to work systematically to release this tension first. This typically involves starting from the final sizing stand and working backward, slightly loosening the pressure adjustments on each roller set. You are not removing them yet, just "backing off" the pressure.
Once the pressure is eased across the entire line, the rollers can be unbolted and removed without resistance. This prevents the binding and jamming that often leads operators to reach for pry bars or hammers. This systematic approach also protects the delicate adjustment mechanisms and bearings within each stand. A client producing high-grade sanitary tubing for the food industry found that this method dramatically reduced unplanned maintenance on their mill stands. Their data showed a 40% reduction in bearing failures within six months of adopting a "loosen-before-remove" policy.
This process should be standardized and included in the operator's work instructions. For our XZS machines with automated roller pressure controls, this can even be programmed as a "release sequence" in the PLC, further simplifying and speeding up the process. The operator initiates the sequence, and the machine automatically backs off the pressure on all relevant stands, preparing them for manual removal. This synergy between operator technique and machine capability is key to peak efficiency.
'One-Way Workflow' for Component Handling
A cluttered workspace is an inefficient and unsafe workspace. During dismantling, there must be a clear, organized flow for the removed components. The best practice is to establish a "one-way workflow." The pre-staged cart with the new tooling is on one side of the operator. As an old roller is removed from the machine, it is immediately placed onto a second, designated "returns" cart on the operator's other side. This prevents old, greasy tools from being placed on the floor or mixed in with the clean, new set.
This simple discipline maintains a clear and safe working area. It also prevents the classic error of accidentally reinstalling a component that was just removed. I observed an automotive parts supplier who implemented this strategy and measured the operator's "wasted motion" using spaghetti diagrams before and after. They found that a one-way workflow reduced the operator's total steps taken during a changeover by nearly 30% and eliminated all instances of tool misplacement.
Furthermore, this organized handling ensures that the complete toolset is kept together. When it's time for the used tooling to be cleaned, inspected, and stored, the entire set is present and accounted for on the returns cart. This avoids the time-consuming search for a single misplaced spacer or roller that can delay the tool's return to inventory, making it unavailable for the next run.
Immediate Triage: The Post-Removal Inspection
The moment a tool is removed from the line is the best time for a quick initial inspection, or "triage." The operator should perform a quick visual and tactile check for any obvious signs of damage, such as chipping, cracking, or excessive wear on the roller surface. This isn't the in-depth metrological inspection that will happen later, but rather a first-pass assessment to identify critical issues immediately.
This immediate feedback is invaluable. If a roller shows unexpected, severe wear, it alerts the maintenance and quality teams to a potential problem in the production process—perhaps an issue with strip quality or lubrication—that needs to be addressed before it causes more widespread damage. Finding this problem now, rather than just before the tool is needed again weeks later, is far more efficient.
This triage process can be formalized with a simple checklist on the returns cart. The operator can quickly note the condition of each roller set. This data builds a valuable history for each tool, enabling predictive maintenance rather than reactive repairs. It allows the tooling manager to prioritize refurbishment and replacement schedules based on actual wear data, not just run-time hours.
| Dismantling Step | Inefficient Method | Efficient Method |
|---|---|---|
| Tension Release | Forcing individual rollers out under pressure. | Systematically loosening all stands before removal. |
| Tool Handling | Placing old tools on the floor or near new tools. | Using a 'one-way workflow' with a dedicated returns cart. |
| Inspection | Inspecting tools only when they are needed next. | Performing an immediate visual triage upon removal. |
| Result | Damaged tools, cluttered workspace, extended downtime. | Preserved tools, clean area, rapid and safe process. |
What are the key steps to install new tooling in tube manufacturing machines?
You've efficiently removed the old set, but now comes the most critical phase. An incorrect installation can lead to scrap, machine damage, and a complete loss of the time you just saved. How do you ensure every roller is seated perfectly for a flawless startup?
Key installation steps include thoroughly cleaning all mounting surfaces and shafts before starting. Install rollers in the correct sequence, ensuring each is fully seated against its locating face. Apply proper torque to fasteners and verify clearances to prevent binding and ensure free rotation.
The installation process is a mirror image of the dismantling process—it demands the same methodical precision, just in reverse. This is where the preparation pays off dividends. With the new toolset clean and staged on its cart, the operator can work in a smooth, logical sequence without interruption. I recall a client in the construction materials sector who was struggling with inconsistent weld seams after every changeover. We traced the problem to improper roller installation in the fin-pass section6. Their operators were not ensuring the rollers were seated squarely on the shafts before tightening. By introducing a simple step—requiring them to use a feeler gauge7 to check for gaps before final torque—we eliminated the inconsistency entirely. It added maybe 10 seconds per stand but saved 30 minutes of adjustments and scrap production. This illustrates that successful installation is a matter of following a precise, repeatable procedure where small details have a massive impact on the final product quality and the overall efficiency of the operation.

Installing new tooling is the moment of truth in a quick changeover. Success here is not measured by speed alone, but by the accuracy and integrity of the setup. A flawless installation leads to a flawless first tube, which is the ultimate goal. Rushing this stage is a false economy, as even minor errors can lead to significant problems, from inconsistent tube dimensions to catastrophic equipment failure. The installation process must be treated as a precision engineering task8, broken down into three distinct, non-negotiable stages: surface preparation and sequential mounting, achieving precise alignment and clearance, and applying correct fastening torque. These stages build upon each other to create a stable and accurate tooling foundation for the next production run.
Foundation First: Surface Prep and Sequential Mounting
Before any new component is introduced, the machine itself must be prepared. The operator must meticulously clean all tool-mating surfaces on the mill stands. This includes the drive shafts, locating shoulders, and stand bases. Any residual grime, metal fines, or burrs can prevent a roller from seating perfectly flat, introducing an almost imperceptible tilt that will be magnified down the line, affecting the tube's straightness and profile. Using a clean cloth and a solvent to wipe down these critical surfaces is a mandatory first step.
Once the stands are pristine, the installation can begin, following a strict sequence. Just as dismantling worked backward from the end of the line, installation typically starts with the first breakdown pass and proceeds downstream. Each roller must be carefully guided onto its shaft and confirmed to be flush against its locating face. A common mistake is to tighten the retaining bolts before the roller is fully seated. A best practice is to slide the roller on, give it a slight rotation by hand to ensure it's not binding, and then visually and, if necessary, tactilely confirm there is no gap between the roller hub and the shaft shoulder. Only then should the fasteners be threaded in.
This sequential, stand-by-stand approach ensures a logical workflow. For a client producing precision tubing for furniture, we helped them create a visual guide—a large, laminated diagram posted near the mill—that showed the correct roller for each stand number. This simple job aid eliminated installation errors and reduced the cognitive load on operators, allowing them to focus on the quality of the installation rather than trying to remember the sequence from memory.
The Art of Alignment and Clearance
With the rollers mounted, the next critical phase is ensuring they are correctly aligned with each other and have the proper clearance. This is what defines the pass line and shapes the tube. The initial setup should be based on the pre-determined settings from the job's recipe, which might be loaded on the PLC. The operator uses these settings as a baseline for the vertical and horizontal adjustments of each stand. The goal is to create a perfectly centered, gradually forming channel for the steel strip.
Verifying clearances is essential. This involves using feeler gauges to check the gap between the upper and lower rollers and, in some cases, between the side (fin-pass) rollers. This gap is what determines the pressure applied to the tube and ultimately its final dimensions. An incorrect gap—too tight or too loose—can lead to problems like marking the tube surface, creating an improper weld forge, or producing an out-of-spec diameter.
Modern technology can greatly assist in this process. Some advanced systems incorporate laser alignment tools that project a beam down the center of the mill, providing a clear visual reference for the operator to align each roller set. Our XZS lines, with their CNC-machined frames and precision adjustment screws, provide the mechanical accuracy needed to make these fine adjustments repeatable and reliable. The operator's skill lies in using these tools to verify and, if necessary, fine-tune the alignment to perfection.
izing the Setup: Torque and Confirmation
The final step in the physical installation is to tighten all fasteners to the correct torque specification. This is a frequently overlooked but critical detail. Under-tightening can allow a roller to shift during production, leading to a loss of tolerance. Over-tightening can damage the threads on the shaft or stand and, in extreme cases, deform the roller's bearing race. Using a calibrated torque wrench is not optional; it is a requirement for a professional and repeatable setup.
The torque should be applied in a star or crisscross pattern, similar to tightening the lug nuts on a car wheel. This ensures even pressure is applied and prevents the component from being pulled into a slight misalignment. The required torque values should be clearly stated in the setup procedure sheet or displayed on the HMI screen for the operator's reference.
Once all tools are torqued, a final confirmation check is needed. The operator should be able to turn each roller shaft by hand (with the drive disengaged) to ensure it spins freely without binding. Any resistance indicates a problem—misalignment, improper clearance, or an issue with the bearings—that must be addressed before attempting to run the line. This simple, tactile check is the last line of defense against a bad setup.
| Installation Stage | Common Mistake | Best Practice |
|---|---|---|
| Mounting | Installing on dirty surfaces; random sequence. | Cleaning all mating surfaces; following a logical sequence. |
| Alignment | "Eyeballing" the alignment and gaps. | Using feeler gauges and laser tools against recipe settings. |
| Fastening | Guessing the tightness or using an impact wrench. | Using a calibrated torque wrench to specified values. |
| Confirmation | Starting the line without a final check. | Manually rotating shafts to feel for binding or resistance. |
How to ensure the new tools are accurately calibrated for immediate operation?
The new tools are in, but are they ready? Hitting the 'start' button without proper calibration is a gamble that often results in a pile of expensive scrap metal. How do you bridge the gap between mechanical installation and production-ready precision?
To ensure accurate calibration for immediate operation, run a short test strip or 'leader' through the mill at a low speed. Use micrometers and profile gauges to measure the first few feet of the resulting tube, making fine-tuning adjustments to the roller stands as needed.
Calibration is the delicate final dance that brings the entire changeover together. It’s where the mechanical setup is fine-tuned to produce a tube that meets exact specifications. I have seen countless operators perform a perfect mechanical swap only to become frustrated during startup because the first 50 meters of tube are out of tolerance. The assumption is that if the tools are in, the job is done. But the reality is that tiny, cumulative tolerances in the machine and tooling require a final calibration step. A client producing high-pressure hydraulic lines, where tolerances are non-negotiable, learned this the hard way. They now treat calibration as the most critical part of the changeover. They established a rule: "the line doesn't run at full speed until the first meter is perfect." This mindset shift from 'is it running?' to 'is it running right?' is fundamental to minimizing waste and maximizing the efficiency gained from a quick changeover.
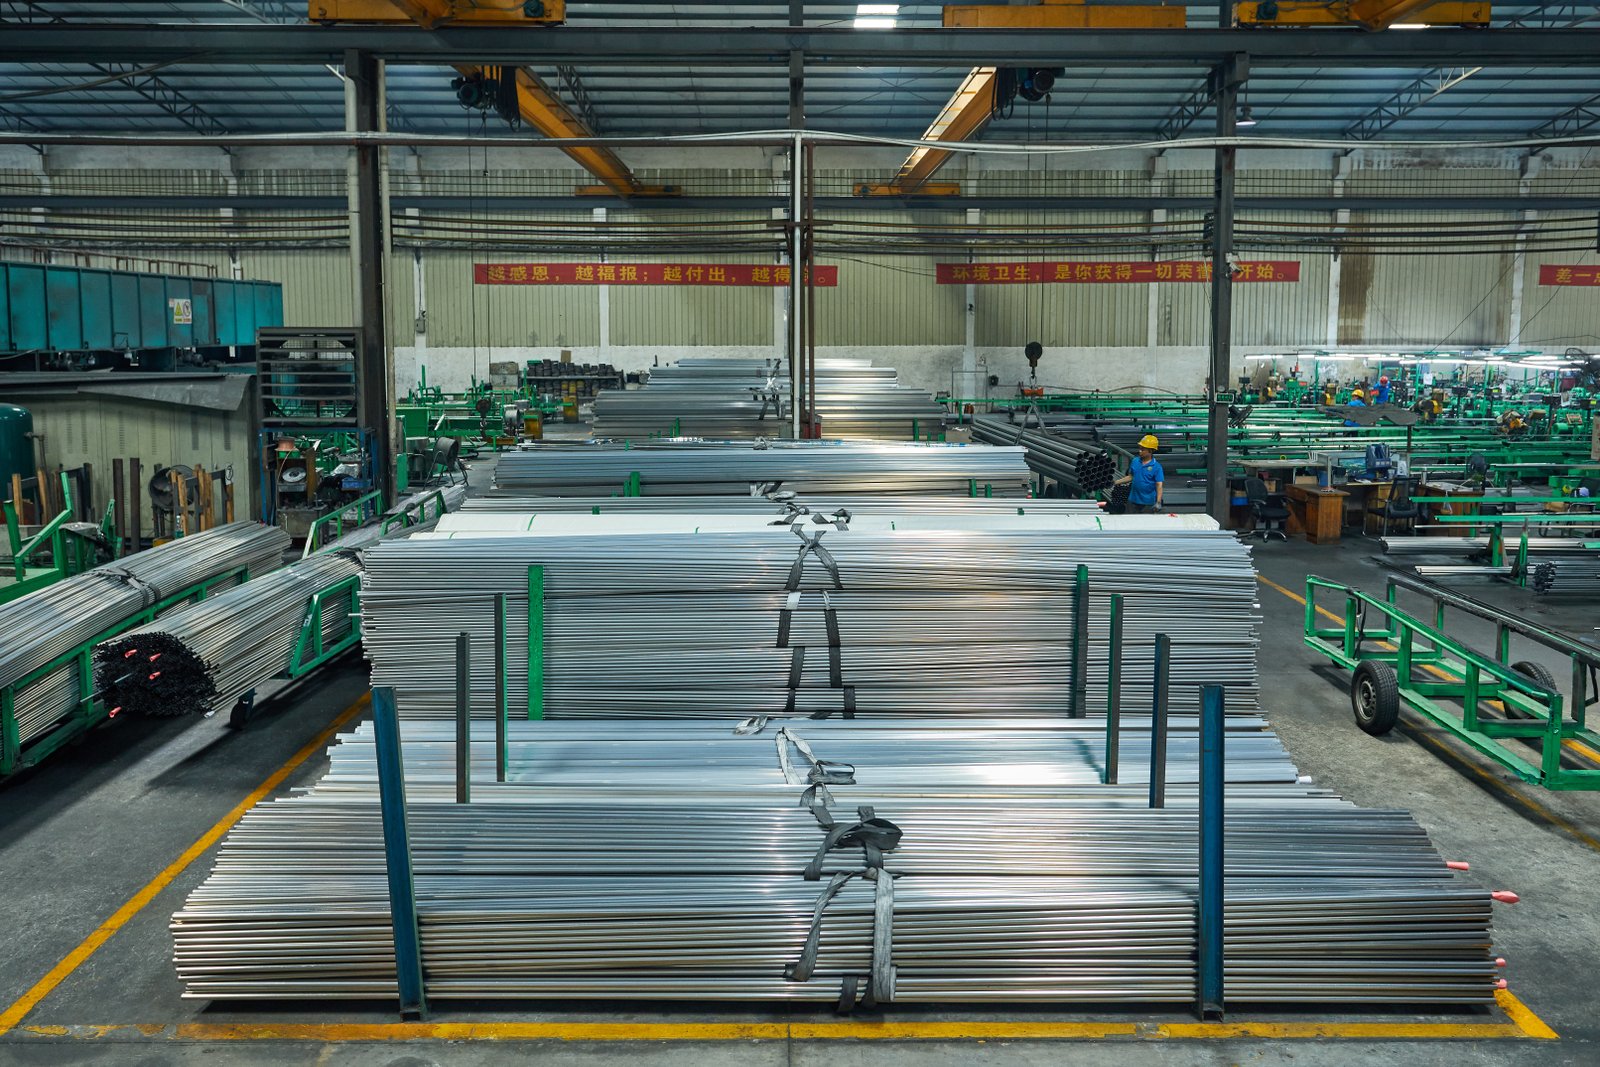
Calibration is not merely a check; it is an active process of adjustment and verification. It transforms a static, mechanical setup into a dynamic, production-ready system. The goal is to make the first piece of tube produced after a changeover a saleable piece of tube. This requires a systematic approach that combines the power of modern control systems9 with the skilled eye of the operator. The process can be broken down into three phases: the initial static setup based on digital recipes, the dynamic verification using a test piece, and the final micro-adjustments to lock in perfection. Each step is designed to systematically eliminate variables and zero in on the precise settings required for the new product.
Leveraging Digital Recipes for a Strong Baseline
The foundation of a rapid and accurate calibration is a reliable starting point. In the past, this starting point was based on an operator's handwritten notes or memory, which could be inconsistent. Today, on a modern tube mill like our XZS lines, the starting point is a digitally stored "recipe."10 This recipe contains the precise set-points for every adjustable axis on the machine for a given tube size and material—roller positions, welder power, welder frequency, and line speed. As discussed in the preparation phase, this recipe should already be loaded in the PLC.
The first step of calibration is a static check of this recipe. The operator confirms that the machine's HMI is displaying the correct parameters for the job at hand. This simple verification prevents one of the most common and costly errors: running a new tube size with the old settings. This digital baseline gets the calibration process 95% of the way there before the strip even begins to move.
It's crucial that these recipes are treated as living documents. If an operator finds that a slight adjustment—say, a +0.05mm tweak to a sizing stand—consistently improves the output for a particular product, this adjustment should be tested, verified, and then saved to the master recipe. This process of continuous improvement, facilitated by the PLC's storage capacity, ensures that the baseline for calibration becomes more and more accurate over time, further shortening the startup process.
The 'Leader' Test: Dynamic Verification and Measurement
With the baseline settings confirmed, it's time for the first dynamic test. It's not yet time to run at full production speed. Instead, the operator will feed a short length of the steel strip—often called a "leader" or "test coupon"—through the mill at a very low speed. This allows them to observe the tube forming in real-time and to stop the line instantly if a major issue, like strip creasing or a misaligned weld seam, becomes apparent.
Once the first few feet of tube have been formed, welded, and cut, the critical measurement phase begins. This piece is the first physical proof of the setup's accuracy. The operator must use calibrated measuring instruments—digital calipers, micrometers, and possibly a Pi tape—to check the tube's outer diameter (OD), wall thickness, and roundness at several points. These measurements are then compared directly against the specifications required for the job.
A furniture tube manufacturer I work with in Southeast Asia developed a "first-piece approval" station right next to the mill's control panel. The operator places the first cut piece into a fixture with go/no-go gauges for diameter and length. It must pass this physical check before the line is cleared for automated running. This creates a hard stop in the process, forcing a meticulous check and preventing a large amount of out-of-spec material from being produced.
Micro-Adjustments and Confirmation
This is where the operator's skill truly shines. Based on the measurements from the leader test, small, incremental adjustments may be needed. For example, if the OD is consistently 0.1mm too large, the operator will make a subtle adjustment to the final sizing stands to bring it into tolerance. If the weld seam is slightly off-center, a minor tweak to the alignment of the fin-pass rollers may be required. The key word here is "micro." Adjustments should be small, and only one variable should be changed at a time before running another short test piece.
Modern HMIs make this process easier by allowing the operator to make these fine adjustments digitally, often in increments as small as 0.01mm. After each adjustment, another test piece is run and measured. This iterative cycle of "adjust-run-measure" continues until the tube is perfectly within spec. While this may take a few minutes, it is far more efficient than producing hundreds of meters of scrap.
Once the measurements are confirmed to be stable and centered within the tolerance band, the operator can give the final confirmation. They document the final settings (if they deviated from the initial recipe), clear the test pieces, and switch the line into its full-speed, automatic production mode. This final, deliberate step marks the successful completion of the calibration and the entire changeover process.
| Calibration Task | Old School Method | Modern, Efficient Method |
|---|---|---|
| Baseline Setup | Operator memory or handwritten notes. | Loading a verified digital recipe from the PLC. |
| First Test | Starting the line and checking the first coil end. | Running a short 'leader' at low speed for initial check. |
| Measurement | Using worn-out calipers; infrequent checks. | Using calibrated digital tools on the first cut piece. |
| Adjustment | Large, reactive adjustments to chase tolerance. | Small, incremental micro-adjustments based on data. |
What final checks should be performed to guarantee successful tooling changeover?
The line is running at full speed and producing what looks like good tube. Is the job done? Walking away without a final, structured check can lead to subtle quality deviations that only become apparent after an entire coil has been scrapped.
checks include monitoring the first few minutes of full-speed production for consistency. The operator should perform regular quality control measurements on the tube, check weld integrity, and listen for any unusual noises from the machinery, confirming all systems are stable before signing off.
A successful changeover isn't just about getting the line running again; it's about ensuring it runs stably and consistently for the entire production run. The first few minutes of full-speed operation are a critical observation period. I learned this from a top engineer at a major automotive exhaust manufacturer. He told me, "I don't trust a setup until I've seen it run for five minutes and have measured three perfect tubes in a row." This "trust but verify" approach is essential. It's the final handshake between the operator and the machine, a confirmation that the meticulous work of the changeover has resulted in a robust and reliable process. This final check is the professional's guarantee, turning a potentially risky startup into a controlled and predictable manufacturing process. It's the last step in cementing the gains from your 15-minute changeover and ensuring that speed did not compromise quality.
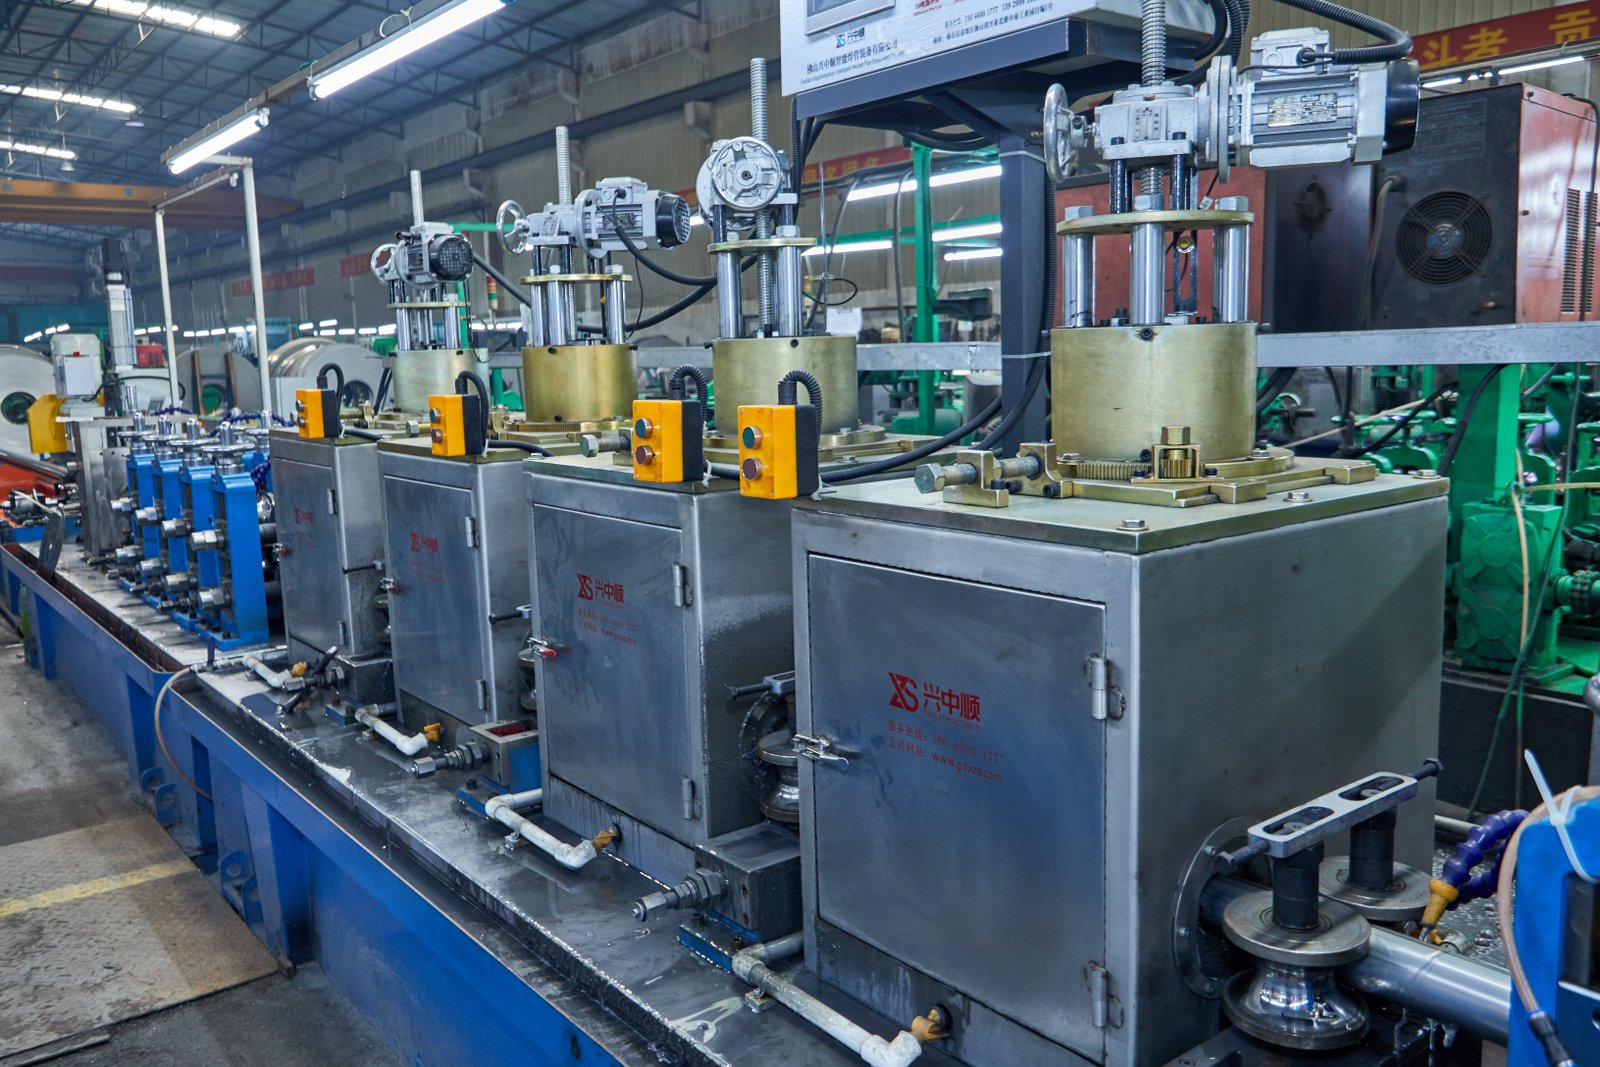
The final checks are the capstone of the entire changeover process. They are a systematic verification that the new setup is not only accurate but also stable under the dynamic stresses of full-speed production. This phase is about moving from a successful startup to a reliable, continuous operation. It’s about catching subtle drifts or inconsistencies before they escalate into major quality issues or costly downtime. This final verification process11 can be structured into three areas: monitoring process stability in the initial run, implementing a structured first-run quality control protocol, and conducting a final systems and housekeeping check of the work area. These checks provide the confidence that the changeover is truly complete.
Monitoring for Initial Run Stability
Once the line is brought up to its designated production speed, the operator's role shifts to that of a vigilant monitor. For the first 5 to 10 minutes, their attention should be fully focused on the machine's performance. This is not a passive activity. It involves actively listening for any new or unusual sounds—a high-pitched whine from a bearing, a clatter in a gearbox, or a change in the hum of the high-frequency welder12. These auditory cues are often the first sign of a developing mechanical issue.
Visual monitoring is equally important. The operator should watch the strip as it enters the forming section to ensure it's tracking smoothly. They must pay close attention to the weld zone, looking for any increase in sparks or changes in the color of the heat-affected zone, which could indicate a fluctuation in weld power or positioning. Observing the tube as it exits the sizing section and travels towards the cutoff can also reveal subtle issues with straightness or twist that might not be apparent from static measurements alone.
At our XZS smart factory, we integrate real-time monitoring data on the HMI to support the operator. The screen can display trend charts for critical parameters like welding amperage, motor load, and line speed. An operator can see if these values are holding steady or if they are beginning to drift or oscillate. This combination of sensory input (eyes and ears) and hard data provides a comprehensive picture of the machine's stability.
First-Run Quality Control Protocol
While the machine is settling into its rhythm, a formal quality control (QC) protocol must be executed. This is more than just re-measuring the tube. It's about confirming that the initial quality achieved during the low-speed calibration is being maintained at full speed. A common practice is to take a sample from the first, second, and fifth minute of the run. These samples undergo the same rigorous measurement as the initial test piece: OD, wall thickness, and roundness. The goal is to confirm that there is no "growth" or change in dimensions as the machine heats up and settles in.
This protocol should also include a check of the weld integrity. This may involve a visual inspection of the internal and external weld bead, and for more critical applications, a flare test or a crush test on a sample piece. For one of our clients producing pipes for the oil and gas industry, this first-run QC check is a documented, mandatory hold point. A quality inspector must physically sign off on the sample tests before the rest of the coil can be processed.
This structured QC approach provides objective evidence that the changeover was successful. It replaces assumption with data. The results should be logged, creating a valuable record for traceability and process analysis. If any measurement falls outside the desired control limits, the line can be stopped and a minor correction made before a significant quantity of non-conforming product is created.
Systems and Housekeeping Sweep
The final step is to close out the job formally. This involves a final sweep of the work area. The "returns" cart with the old tooling should be moved away from the production line to a designated area for cleaning and refurbishment. Any tools used during the changeover—wrenches, gauges, cleaning supplies—should be wiped down and returned to their proper storage locations. A clean and organized workspace is the starting point for the next changeover's efficiency.
This is also the time for a final systems check on the machine's HMI. Confirm that no alarms or warning messages are present. The operator should verify that the production counter has been reset and that the system is correctly tracking the new job's footage or piece count. This administrative wrap-up is crucial for data integrity and production planning.
By completing this final check, the operator officially hands over a stable, verified, and clean production unit. It closes the loop that began with preparation. This discipline ensures that efficiency gains are not temporary but are part of a sustainable, professional manufacturing culture. It signals that the changeover is 100% complete and the operator can now shift their focus to monitoring the long-term run.
| Check | Poor Practice (Risky) | Best Practice (Reliable) |
|---|---|---|
| Initial Run | Walking away as soon as the line is at speed. | Actively monitoring sight, sound, and data for 5-10 minutes. |
| Quality Control | Assuming the first piece's quality will hold. | Performing structured QC checks at 1, 2, and 5 minutes. |
| Work Area | Leaving old tools and clutter near the line. | Cleaning and organizing the area; returning all tools. |
| System Status | Ignoring the HMI after startup. | Verifying no alarms and confirming production tracking. |
Conclusion
Ultimately, a 15-minute tooling changeover is not a myth. It is the direct result of a disciplined system combining meticulous preparation, precise execution, and thorough verification. Mastering this process is a key differentiator, transforming downtime from a liability into a competitive advantage for your operation.
-
Learn step-by-step techniques for ultra-fast tooling changeovers in industrial settings ↩
-
Understand which mechanisms enable fast yet precise tool swaps on tube production lines ↩
-
Get a practical guide to correct LOTO steps for maximum safety during equipment changeovers ↩
-
Understand the impact of maintenance and training on safety, efficiency, and equipment lifespan. ↩
-
Discover how SMED accelerates tool changeovers and boosts manufacturing productivity. ↩
-
Learn why proper roller installation in the fin-pass section is vital for weld seams and tube quality ↩
-
Discover how to use feeler gauges for accurate clearance checks in tube mill setups ↩
-
Understand the principles and benefits of treating tooling changeover as a precision engineering process ↩
-
See how advanced control technology improves calibration accuracy and production quality ↩
-
Understand digital recipe management and its impact on repeatable machine calibration ↩
-
Explore standard procedures and benefits of a thorough final verification after line setup ↩
-
Understand high-frequency welding and spot common sound-based warning signs in tube mills ↩

