Diagnosing Weld Defects Fast: Troubleshooting Guide for Tube Manufacturing Machinery Teams

Are you tired of production lines grinding to a halt because of a sudden weld defect? The pressure mounts as downtime costs accumulate and delivery schedules are threatened. I know this frustration well; a seemingly small flaw can cascade into significant financial and reputational damage.
Weld defect diagnosis is the systematic process of identifying the type, severity, and root cause of flaws in a welded tube seam. It involves a combination of visual inspection, non-destructive testing (NDT), and process parameter analysis to implement effective corrective actions and prevent recurrence, ensuring product integrity.
Over my 15 years in this industry, I've seen how quickly a minor issue can escalate. The difference between a profitable production run and a costly, scrap-filled disaster often comes down to how fast and accurately your team can troubleshoot. This isn't just about fixing a problem; it's about understanding it so deeply that you can prevent it from ever happening again. Let’s move beyond simple fixes and build a truly resilient manufacturing process.
The ability to diagnose defects is more than a technical skill; it's a core business competency. Reactive maintenance—waiting for a problem to occur—is a race to the bottom. It leads to unpredictable downtime and erodes profit margins. A proactive approach, however, transforms your operations. I recall a client in the automotive sector who was plagued by intermittent weld failures. By implementing the diagnostic principles we'll discuss, they didn't just fix the issue; they uncovered an underlying inefficiency in their material handling that, once resolved, boosted their output by nearly 15%. This guide is built on that philosophy: empowering your team with the foresight to turn potential crises into opportunities for improvement, leveraging advanced machinery and rigorous processes to build a foundation of quality and reliability.
How to identify common weld defects in tube manufacturing?
Is your team struggling to distinguish a harmless surface imperfection from a critical structural flaw? Misidentifying a defect can lead you down a rabbit hole of incorrect "fixes," wasting valuable time, materials, and labour while the real problem persists, threatening your entire production schedule.
To identify common weld defects, start with a visual inspection for issues like undercut, excessive reinforcement, or surface porosity. For internal flaws, employ non-destructive testing methods such as Ultrasonic Testing (UT) and Eddy Current Testing (ECT) for cracks and pinholes.
The first step in any effective troubleshooting process is accurate identification. It’s like a doctor diagnosing an illness; you can't prescribe the right treatment without first knowing what you're dealing with. A few years ago, I worked with a furniture manufacturer in Southeast Asia who was experiencing what they thought was random weld cracking. Their team was adjusting weld power and speed, chasing a ghost. However, a closer look using a simple magnifying glass revealed the cracks were initiating from a specific "stitch" pattern, which wasn't a welding issue at all. It was a sign of embrittlement caused by a contaminated steel strip from their supplier. By correctly identifying the defect's characteristics, they shifted their focus from the machine to their raw material intake process, solving the problem permanently. This experience taught me a valuable lesson: a disciplined, methodical approach to identification is the foundation of efficient problem-solving. It prevents wasted effort and directs your resources precisely where they are needed, turning a chaotic guessing game into a structured investigation. Without this crucial first step, any subsequent action is just a shot in the dark.
Understanding Defect Morphology Through Visual Inspection
Visual inspection is your first and most powerful line of defence. It is fast, requires minimal equipment, and can reveal a wealth of information if you know what to look for. Your operators should be trained to be detectives, scrutinising the weld bead for tell-tale signs of trouble. An "undercut," for example, appears as a groove melted into the base metal next to the weld toe. It’s not just a cosmetic issue; it's a stress concentrator that can lead to fatigue failure. We once helped a client producing high-grade decorative tubing who was experiencing this. The root cause wasn't excessive heat, as commonly assumed, but rather improperly aligned fin pass rolls, which were creating an uneven presentation of the strip edges to the weld point.
Another common visual defect is "excessive reinforcement," or a weld bead that is too high. This often indicates that the squeeze pressure is too great or the welding temperature is too low, forcing the metal outwards instead of forging it together cleanly. This not only wastes material but can also create issues for downstream processes like polishing or coating. A systematic visual check, guided by a clear defect library with photos and descriptions, empowers your team to catch these issues the moment they appear, often tracing them back to a specific setup parameter that can be adjusted immediately.
ly, surface porosity, which looks like small pinholes or gas pockets on the bead, is a clear indicator of contamination. This could be moisture, oil, or rust on the strip edges, or even issues with the shielding gas if one is used. By recognising these distinct visual cues, your team can immediately narrow down the potential causes. Is the porosity uniform along the entire length? The problem is likely with the raw material coil. Is it intermittent? It might be an issue with a lubricant drip or inconsistent cleaning. This initial visual triage is critical for directing the deeper investigation that follows.
Probing Deeper with Non-Destructive Testing (NDT)
While the eye can see the surface, the most dangerous defects often lurk within the weld itself. This is where Non-Destructive Testing (NDT) becomes indispensable. At XZS, we often integrate online NDT systems like Eddy Current Testing (ECT) directly into our tube mill lines because it provides a continuous, real-time quality check. ECT is exceptionally good at detecting surface and near-surface discontinuities like cracks, pinholes, and small voids. It works by inducing a magnetic field in the tube; any flaw disrupts this field, which is instantly registered by the system's sensors, triggering an alarm or marking the tube section.
For detecting deeper, internal flaws like incomplete fusion or internal cracks, Ultrasonic Testing (UT) is the industry standard. UT sends high-frequency sound waves into the material. These waves travel through the tube and reflect off the back wall. If there's a defect in the path, such as a void where the two edges didn't fully fuse, the sound wave reflects back sooner, and the system maps the size and location of the flaw. I remember an oil and gas client in Brazil who was required to meet stringent API standards. Their visual inspection was perfect, but random destructive tests were failing. By retrofitting their line with an inline UT system, they discovered intermittent lack of fusion caused by subtle power fluctuations in their old HF welder, something completely invisible from the outside.
The choice between NDT methods depends on the application, material, and likely defects. ECT is fast and great for continuous production monitoring of smaller flaws, while UT provides a more detailed picture of the internal weld structure, which is critical for high-pressure or structural applications. Combining robust visual inspection with the right NDT technology gives you a complete, multi-layered view of your weld quality, leaving no room for dangerous hidden flaws.
| Характеристика | Visual Inspection | Eddy Current Testing (ECT) | Ultrasonic Testing (UT) |
|---|---|---|---|
| Defect Type | Surface (undercut, porosity, reinforcement) | Surface & near-surface (cracks, pinholes) | Internal & surface (lack of fusion, voids) |
| Скорость | Fast (can be done by operator) | Very Fast (inline, real-time) | Slower (requires careful setup) |
| Primary Use | First-line, immediate process feedback | 100% online quality assurance | Detailed flaw analysis, acceptance testing |
| Operator Skill | Basic to Intermediate Training | Requires certified technician for setup | Requires certified NDT technician |
| Стоимость | Низкий | Moderate initial investment | High initial investment & operational cost |
Distinguishing Material vs. Process-Induced Defects
A critical part of identification is determining if the flaw originates from the raw material itself or from your manufacturing process. This distinction is vital because the solutions are completely different. Fixing a machine will never solve a bad batch of steel. Material-induced defects often have a distinct, repetitive pattern that aligns with the rolling direction of the steel coil. Examples include laminations or inclusions within the steel strip, which can open up during welding and cause persistent, linear defects.
We encountered a classic case with a building-material wholesaler who was producing square tubes. They faced a recurring issue of weld splitting at the corners during secondary forming. Their initial reaction was to blame the welding parameters. However, after we helped them analyze the failed samples, we found that the steel's chemical composition was inconsistent, with high levels of sulfur creating brittle zones. The defect wasn't a failure of the weld process, but a failure of the material to be welded. The solution was implementing a stricter raw material receiving protocol, including spot-checking material test reports from their supplier.
Process-induced defects, on the other hand, are often more variable and can be directly correlated with machine operations. For instance, a "stitching" effect, where the weld alternates between good and bad sections, often points to an unstable HF welder output or a worn contact tip. A weld that wanders off the seam is almost always a sign of roll misalignment or inconsistent strip guiding. By carefully observing the defect's characteristics—is it consistent with the coil's length or does it change with machine speed or temperature?—you can accurately diagnose whether to call your steel supplier or your maintenance team. This diagnostic step saves immense amounts of time and prevents unnecessary and ineffective adjustments to your production line.
Steps to assess the severity of weld defects
You've identified a defect, but is it a minor cosmetic blemish or a critical failure waiting to happen? Treating every flaw with the same urgency wastes resources, while ignoring a serious one can lead to catastrophic field failures, liability claims, and irreparable damage to your brand.
To assess a weld defect's severity, first categorize it by type (e.g., porosity, crack). Then, measure its dimensions and frequency, comparing them against established acceptance criteria from industry standards (like API, ASTM) or customer specifications. Finally, evaluate its potential impact on the tube's end-use.
The concept of fitness-for-service1 is paramount here. A small amount of surface porosity that might be perfectly acceptable for a decorative furniture tube would be an immediate cause for rejection for a high-pressure hydraulic line. The severity of a defect is not absolute; it's relative to the product's application. I once guided a client, an automotive exhaust manufacturer, in developing a simple triage system. We created a visual chart with three levels: "Level 1: Monitor" for minor cosmetic issues, "Level 2: Contain & Analyze" for defects that might impact performance, and "Level 3: Stop & Correct" for critical flaws like cracks. This simple framework eliminated confusion on the shop floor. It empowered operators to make consistent, informed decisions, ensuring that minor issues didn't cause unnecessary downtime while guaranteeing that critical defects were never overlooked. This structured assessment is what separates panicked reactions from professional, controlled responses.
Establishing Acceptance Criteria Based on Application
The foundation of any severity assessment is a clear set of acceptance criteria. You cannot judge if a defect is too big if you haven't defined "big." These criteria are not arbitrary; they are derived from the demands of the tube's final application. For a general contractor buying structural tubing for building frames, the primary concerns are load-bearing capacity and dimensional accuracy. The standards, such as ASTM A5002, will allow for a certain level of imperfection as long as the tube's mechanical properties are not compromised. The weld must be sound, but a minor surface blemish is unlikely to be a point of failure.
Contrast this with an EPC contractor we work with in the Middle East, who procures large-diameter pipes for oil and gas pipelines. Here, the stakes are exponentially higher. The application involves high pressure, corrosive materials, and extreme environmental conditions. The governing standard, likely API 5L3, has exceptionally strict limits on defect size, particularly for planar flaws like cracks or lack of fusion, which can grow under pressure and lead to leaks or ruptures. For this client, even a tiny, visually insignificant crack is a "Level 3" critical defect, mandating immediate rejection of the pipe.
As a machine builder, we design our systems with this variability in mind. Our XZS intelligent production lines allow for the precise calibration of welding parameters to meet these diverse standards. The PLC controls can store recipes for different products and their corresponding quality standards. This means a producer can confidently switch from making commercial-grade tubing to high-spec industrial pipe, knowing the machine's setup is optimized to produce a weld that meets the stringent acceptance criteria for that specific application, ensuring fitness-for-service is designed into the process from the start.
Quantitative vs. Qualitative Assessment
Once you have your acceptance criteria, you need methods to measure the defect against them. This involves both qualitative and quantitative approaches. Qualitative assessment is often the first step. It's a judgment-based evaluation, typically visual, that categorizes the defect. An operator might grade a weld's appearance on a scale of A, B, C, where 'A' is a perfect, uniform bead and 'C' has noticeable flaws like an uneven profile or spatter. This provides a quick, high-level check on process stability.
However, for a definitive assessment, you must move to quantitative measurement. This means putting a number on the defect. For an external flaw like an undercut, you can use a weld gauge or a digital profilometer to measure its depth to the hundredth of a millimeter. For internal flaws detected by NDT, the system's software provides precise data on the defect's length, depth, and orientation. This quantitative data is non-negotiable. If your customer's specification states "no undercut deeper than 0.1mm," a measurement of 0.15mm is an objective failure.
This data-driven approach removes subjectivity and potential for human error. We worked with a heat-exchanger manufacturer who was struggling with inconsistent quality judgments between shifts. We helped them implement a process where any weld flagged by the Eddy Current system was cross-checked with a profilometer. This quantitative check became the ultimate authority, standardizing their quality control process. The table below illustrates how defects can be categorized for a structured response.
| Severity Level | Defect Examples | Typical Assessment Method | Required Action |
|---|---|---|---|
| Level 1 (Minor) | Slight color variation, minor spatter | Visual Check (Qualitative) | Document and monitor trends. No immediate action. |
| Level 2 (Moderate) | Slight undercut, excessive reinforcement | Visual & Gauge Measurement (Quantitative) | Contain batch. Perform root cause analysis. Adjust process. |
| Level 3 (Critical) | Any crack, lack of fusion, surface porosity | NDT & Destructive Testing (Quantitative) | Stop production immediately. Quarantine all suspect product. |
The Role of Historical Data in Severity Assessment
A single defect tells you what is happening now; a history of defects tells you what is likely to happen next. A truly mature quality system uses historical data to add a predictive layer to its severity assessment. Every defect, regardless of its initial severity, should be logged. Our XZS production lines facilitate this with advanced PLC systems that can log thousands of data points, from weld parameters to NDT results, all time-stamped and recorded.
By analyzing this data over time, you can spot trends that reveal deeper, systemic issues. For instance, a "Level 1" minor undercut that appears randomly once a week might be dismissed. But if the data shows its frequency is increasing, from weekly to daily to hourly, it's no longer a minor issue. It's an early warning sign of a progressive failure, such as the bearings in a weld roll wearing out. This trend transforms a low-severity defect into a high-priority predictive maintenance task. You can now schedule a replacement during planned downtime before it becomes a critical "Level 3" failure that stops the line unexpectedly.
I saw the power of this firsthand with a large stainless-steel tube producer in India. They were using our line's data logging feature to track every alert from their inline ECT system. By correlating these alerts with their maintenance logs, they discovered a direct relationship between the frequency of minor flaw alerts and the service life of their solid-state HF welder's capacitors. They developed a model that allowed them to predict capacitor failure weeks in advance, completely eliminating what used to be a major source of unplanned downtime. This is the pinnacle of severity assessment: using data not just to judge the past, but to control the future.
[text-placehold].
- query for google: Null
- query for google: Null
Methods to determine the root causes of weld defects
You've found a defect and stopped it, but the same problem mysteriously reappears a week later. Fixing the symptom—the bad weld—is a temporary patch. If you don't eliminate the underlying disease, you'll be stuck in a frustrating and costly cycle of recurring failures and constant firefighting.
To determine the root cause of a weld defect, employ systematic problem-solving methods like the 5 Whys techniqueto drill down to the foundational issue, or use a Fishbone (Ishikawa) diagram to brainstorm and categorize all potential causes across Man, Machine, Material, and Method.
Simply blaming the operator or the machine is a superficial analysis. True root cause analysis (RCA) requires a curious and disciplined mind. It’s about asking "Why?" relentlessly until you can go no further. I often tell my clients that the first answer is rarely the real cause; it's just another symptom. For instance, the weld is porous. Why? Because of contamination. This is where many teams stop. But the real work begins here. Why was there contamination? Where did it come from? Why wasn't it caught? This structured questioning transforms the investigation from a blame game into a collaborative search for a systemic solution, ensuring that when you implement a fix, it's a permanent one.

Drilling Down with the "5 Whys" Technique
The "5 Whys" is a beautifully simple yet powerful tool for getting past surface-level problems to the core issue. It’s a lean manufacturing principle4 that forces you to follow a chain of causality. Let's walk through a real-world example I experienced with a client manufacturing stainless steel pipes for sanitary-ware. They were dealing with intermittent "incomplete fusion" defects.
Their initial analysis stopped at "insufficient weld heat." This led them to constantly increase the power on their HF welder, which caused other problems like excessive weld flash. It was time for a more structured approach.
- Why was there incomplete fusion? Because the heat at the weld point was insufficient to melt the strip edges completely.
- Why was the heat insufficient? Because the High-Frequency (HF) current was not being delivered efficiently to the strip edges. (Now we are moving from the symptom to the system).
- Why was the current delivered inefficiently? Because the impeder, which concentrates the magnetic field, was worn and misaligned.
- Why was the impeder worn and misaligned? Because the regular maintenance check to inspect and adjust the impeder was missed. (We're now at a process level).
- Why was the maintenance check missed? Because the task was not included in the new operator's startup checklist, and the maintenance schedule was not clearly displayed at the workstation. (This is the root cause).
The solution was not to "turn up the power." The true, lasting solution was to update the operator checklist and implement a clear visual management system for the PM schedule. By asking "Why?" five times, we moved from a technical problem (lack of heat) to a systemic process failure (poor documentation and communication). This is the goal of RCA: to find a process-based solution that prevents the problem's recurrence, regardless of who is operating the machine.
Mapping Possibilities with the Fishbone Diagram
While the 5 Whys is excellent for linear problems, some defects have multiple potential causes that need to be considered simultaneously. For this, the Fishbone (or Ishikawa) diagram5 is the perfect tool. It provides a visual framework to brainstorm and organize all potential causes, ensuring no stone is left unturned. The "head" of the fish is the problem (e.g., "Weld Undercut"), and the "bones" represent categories of potential causes.
I often use the 4-M model (Machine, Method, Material, Man) as a starting point. Let's apply it to the "Weld Undercut" problem for a carbon steel tube producer.
- Machine: Could it be the HF welder power being too high? Are the weld box rolls worn or incorrectly profiled? Is the squeeze pressure too low, allowing the molten metal to be pushed away?
- Method: Is the production line speed too fast for the current heat setting? Is the setup procedure for the weld box alignment being followed correctly? Are the edges of the strip being properly scarfed or cleaned before welding?
- Material: Is the steel strip's thickness or width inconsistent? Does the chemical composition vary, affecting its melting point? Is there a hard-to-remove scale or coating on the surface?
- Man (Operator): Is there a lack of training on how to properly set the weld parameters? Was a setup error made during a changeover? Is the operator correctly identifying the start of the defect?
Using this diagram with the team on a whiteboard allows everyone to contribute their expertise. A maintenance technician might point to roll wear, while an operator might highlight an issue with a recent coil of steel. We used this exact method with a client in the US making structural tubing. Their Fishbone diagram revealed that the most likely cause was not the welder or the operator, but the "Method" bone—specifically, their setup procedure after a tooling change was not robust enough, leading to inconsistent alignment. This collaborative approach not only identified the root cause but also created team buy-in for the new, more detailed setup procedure.
| Cause Category | Potential Root Causes for "Weld Porosity" |
|---|---|
| Machine | Clogged coolant lines on the weld coil, moisture in compressed air lines, fluctuating HF power. |
| Method | Line speed too high (insufficient time for gases to escape), incorrect impeder placement, improper strip edge cleaning. |
| Material | Moisture, oil, rust, or paint on strip surface. High sulfur or carbon content in steel. Lamination in raw material. |
| Man (Operator) | Incorrect setup of cleaning station, failure to notice contaminated material, incorrect parameter settings. |
| Environment | High humidity in the factory, drafts blowing contaminants onto the strip. |
Using Machine Data for Definitive Answers
In today's smart factories, we have a fifth "M" to add to our analysis: Measurement (or Data)6. Modern tube production lines, like our XZS series, are equipped with sophisticated PLC controls and sensors that act as a black box recorder for your entire process. When a defect occurs, you no longer have to guess what the machine was doing; you can go back and look at the data.
Imagine your inline NDT system flags a 1-meter section of tube with intermittent porosity. With an integrated system, you can pull up the time-stamped data log for that exact moment of production. Did the HF welder amperage fluctuate? Did the line speed suddenly change? Was there a drop in squeeze roll pressure? The data provides objective evidence that can instantly confirm or deny the hypotheses from your Fishbone diagram.
I recall working with a heavy-duty tube mill operator who was chasing a random weld flaw for weeks. When we installed our data logging system, the pattern became obvious in hours. Every time the flaw occurred, it was preceded by a small, brief spike in the main drive motor's amperage, which happened when a new coil was welded onto the end of the old one. The resulting jolt was causing a momentary misalignment in the weld box. The root cause was not in the tube mill itself, but in the strip accumulator and shear welder upstream. The data connected the dots between two seemingly unrelated events, leading to a quick and effective solution. Leveraging machine data transforms root cause analysis from a process of deduction to a process of verification.
The process for implementing corrective actions in tube manufacturing
You've done the hard work and found the root cause. But how do you implement a fix without causing new problems? A rushed or poorly communicated change can disrupt workflows, confuse operators, and in the worst-case scenario, make the original problem even worse.
A successful corrective action process involves documenting the planned change, assigning clear ownership, communicating the "what" and "why" to all affected staff, implementing the action in a controlled trial, and rigorously verifying its effectiveness before rolling it out to full production
Implementing a corrective action is a change management process. It requires the same level of discipline and planning as the diagnostic phase. I’ve seen a brilliant root cause analysis completely undone by a chaotic implementation. A maintenance team might make a mechanical adjustment, but if they don't inform the quality or operations teams, the new process might not be properly monitored, or it may conflict with existing procedures. The key is to treat every corrective action as a mini-project: it needs a plan, a leader, a timeline, and a clear definition of success. This systematic approach ensures that your solutions are not only effective but also sustainable and seamlessly integrated into your daily operations.
Short-Term Containment vs. Long-Term Corrective Action
The very first step after identifying a problem is containment7. This is the emergency response. Its goal is to prevent any more defective product from being produced or reaching a customer. Containment actions are immediate and temporary. This could involve placing all tubes produced since the last good quality check on hold, increasing the frequency of inspection for all new production, or even stopping the line completely if the defect is critical (a Level 3 severity). This step quarantines the problem and buys you the time to perform a proper root cause analysis without pressure.
Once the root cause is known, you can develop the long-term corrective action8. This is the permanent solution designed to eliminate the root cause and prevent recurrence. For the "5 Whys" example where the impeder check was missed, the containment action was to inspect the impeder on the spot and stop the line. The long-term corrective action was to formally update the operator's standard work instruction (SWI) checklist and add the task to the PM schedule. The two actions are distinct but linked; containment stops the bleeding, while the corrective action performs the surgery.
It's crucial that teams understand this difference. A client producing automotive components once "fixed" a recurring dimensional issue by having operators constantly tweak the roll stands throughout their shift. This was their containment action, but it had become their permanent process. It was exhausting for the operators and led to inconsistency. The true long-term corrective action, which we helped them implement, was to perform a full roll alignment using laser tools—a task that took four hours but eliminated the need for constant adjustments for the next six months. They had been living with the emergency response instead of implementing the permanent cure.
The Critical Role of Communication and Change Management
A corrective action is only as good as its execution, and execution hinges on clear communication. You cannot expect an operator to embrace a change if they don't understand why it's necessary. A simple mechanical adjustment might require a change in how an operator monitors the line; a new material specification might require a different setup parameter. If these changes are not communicated effectively, the operator may unknowingly revert to the old process, undoing the fix.
Developing a simple but formal Corrective Action Plan (CAPA)9 document is best practice. This one-page form should outline the problem, the root cause, the containment action taken, the proposed long-term corrective action, who is responsible for implementing it, and the deadline. Before implementation, this plan should be reviewed with the entire affected team—operators, maintenance, and quality personnel. This meeting is not just to inform them; it's to get their feedback. They may foresee a practical problem with the proposed solution that an engineer in an office might miss.
I worked with a team where the engineers decided the solution to a weld seam issue was to increase the squeeze pressure. They wrote the procedure and expected it to be followed. However, they failed to communicate that this would also increase the size of the internal weld bead. This created a major problem for the downstream deburring process, causing another line stoppage. A simple 15-minute meeting with the whole team would have caught this. Effective change management creates alignment and shared ownership, ensuring that when a solution is implemented, it works for the entire process, not just one part of it.
Verification and Validation: Proving the Fix Works
You've implemented the change. How do you know it worked? The final, and most frequently skipped, step is [verification and validation](https://en.wikipedia.org/wiki/Corrective_and_preventive_action#:~:text=Corrective%20and%20preventive%20action%20(CAPA%20or%20simply,of%20the%20root%20cause%20of%20the%20non%2Dconformance.)[^10]. You must prove, with data, that the corrective action has solved the problem and has not introduced any new ones. Verification is the process of confirming the action was completed as planned. Did the maintenance team replace the worn roll? Has the new checklist been posted at the workstation? It's a simple audit to ensure the plan was followed.
Validation is the process of confirming the fix was effective. This is where you test the result. This typically involves a controlled trial run. You produce a small, clearly identified batch of tubes using the new process. This trial batch must then be subjected to rigorous testing—more rigorous, in fact, than your standard QC checks. This should include enhanced NDT, dimensional checks, and, most importantly, destructive testing. A flare test, crush test, or bend test10 will reveal the true integrity of the weld in a way that non-destructive methods cannot.
The results of these tests provide the objective evidence that your problem is solved. The table below shows a simplified CAPA template that includes this crucial final step. Only after the "Verification/Validation" column is filled with positive, data-backed results should the new process be approved for standard production. This closed-loop process ensures that your solutions are robust, data-driven, and final.
| CAPA Element | Description | Example |
|---|---|---|
| Problem Statement | Clear, concise description of the defect. | Intermittent weld seam cracking at 20x magnification. |
| Root Cause | The foundational issue identified via RCA. | Incorrect grade of raw material (too brittle) delivered by supplier. |
| Containment Action | Immediate steps to stop the bleeding. | Quarantined all tubes from coil #XYZ. Stopped line. |
| Corrective Action | The permanent fix. | Implement mandatory material cert check and Rockwell hardness test at receiving. |
| Responsibility & Due Date | Who owns the action and when it will be done. | John Smith (Receiving Lead), by Friday EOD. |
| Verification & Validation | How you will prove it worked. | Test 5 samples from new coil with hardness tester. Run 10-meter trial, perform crush test. All tests passed. |
| Status | Open / Closed | Closed |
Effective measures to prevent future weld defects in tube manufacturing
You're now an expert at diagnosing and correcting defects. But constantly fighting fires is exhausting and unprofitable. The ultimate goal is to prevent the fire from starting in the first place. How can you shift from a reactive to a proactive mode of operation?
To prevent future weld defects, combine a robust preventive maintenance program for machinery and tooling, with stringent quality control for incoming raw materials, continuous operator training, and an investment in stable, highly automated production lines that minimize process variability.
Prevention is about building a culture of quality and discipline, supported by systems and machinery that make it easy to do things right and hard to do them wrong. It’s about controlling your inputs—material, machine condition, operator skill—so that a quality output is the inevitable result. I've visited hundreds of factories, and the most profitable and stress-free operations are not the ones that are best at fixing problems, but the ones that have systematically eliminated the causes of those problems. Their success isn't luck; it's the result of a deliberate, long-term strategy focused on prevention.
Designing a Robust Preventive Maintenance (PM) Program
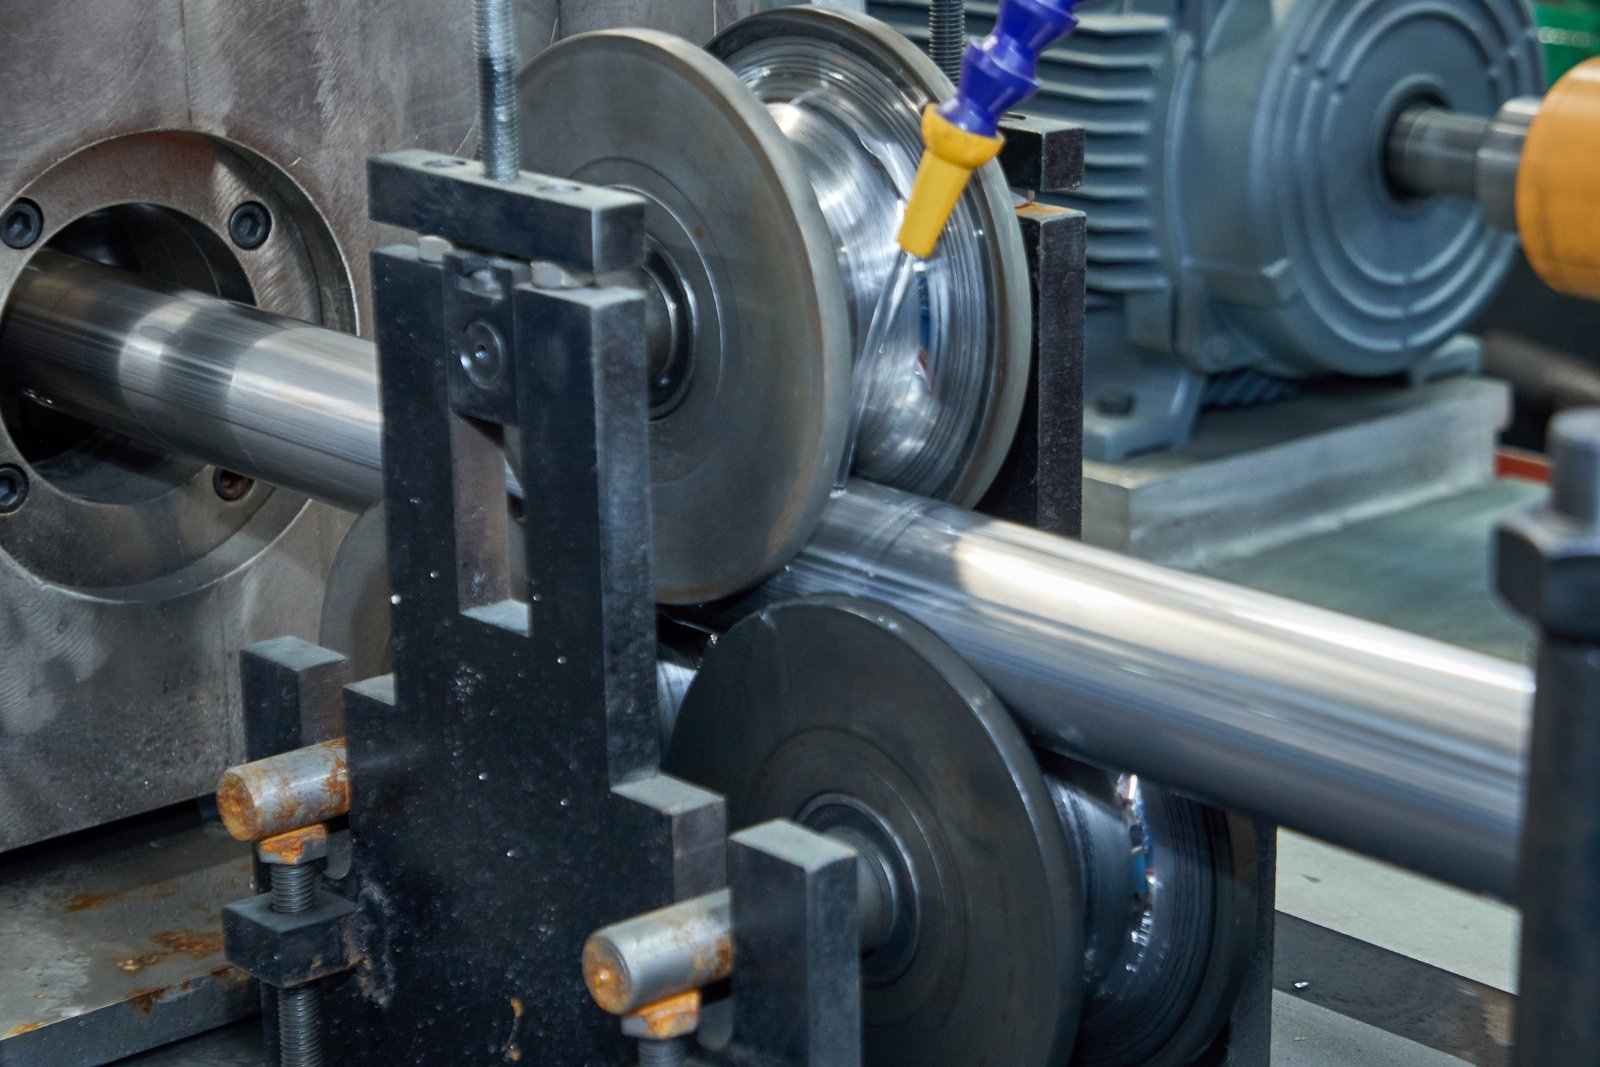
The most common source of process variability is a machine that is slowly degrading over time. A robust Preventive Maintenance (PM) program11 is the antidote. It replaces the "if it ain't broke, don't fix it" mentality with a schedule of inspections, cleaning, lubrication, and parts replacement designed to keep the machine in its optimal "as-new" condition. This isn't just about avoiding breakdowns; it's about maintaining the precision required for a perfect weld. For instance, slight wear in the bearings of a fin pass roll stand, invisible to the naked eye, can cause a vibration that leads to inconsistent seam presentation and weld defects.
A world-class PM program is multi-tiered. It starts with daily operator tasks: cleaning the weld area, visually inspecting rolls and contacts, and checking coolant levels. This is often called autonomous maintenance. Then, you have weekly or monthly tasks for the maintenance team, such as lubricating key components, checking the alignment of the weld box with gauges, and inspecting the impeder for wear. ly, you have annual or semi-annual overhauls, which might involve a full roll-and-bearing replacement or a calibration of the HF welder by a specialist.
At XZS, we design our machines to facilitate this. We use robust, CNC-machined frames that hold their alignment longer, reducing the frequency of major recalibration. We also prioritize accessibility to key components like the weld box and HF contacts, making inspection and replacement faster and easier. A well-designed machine supported by a disciplined PM program is the first pillar of defect prevention, ensuring your process baseline remains stable day in and day out.
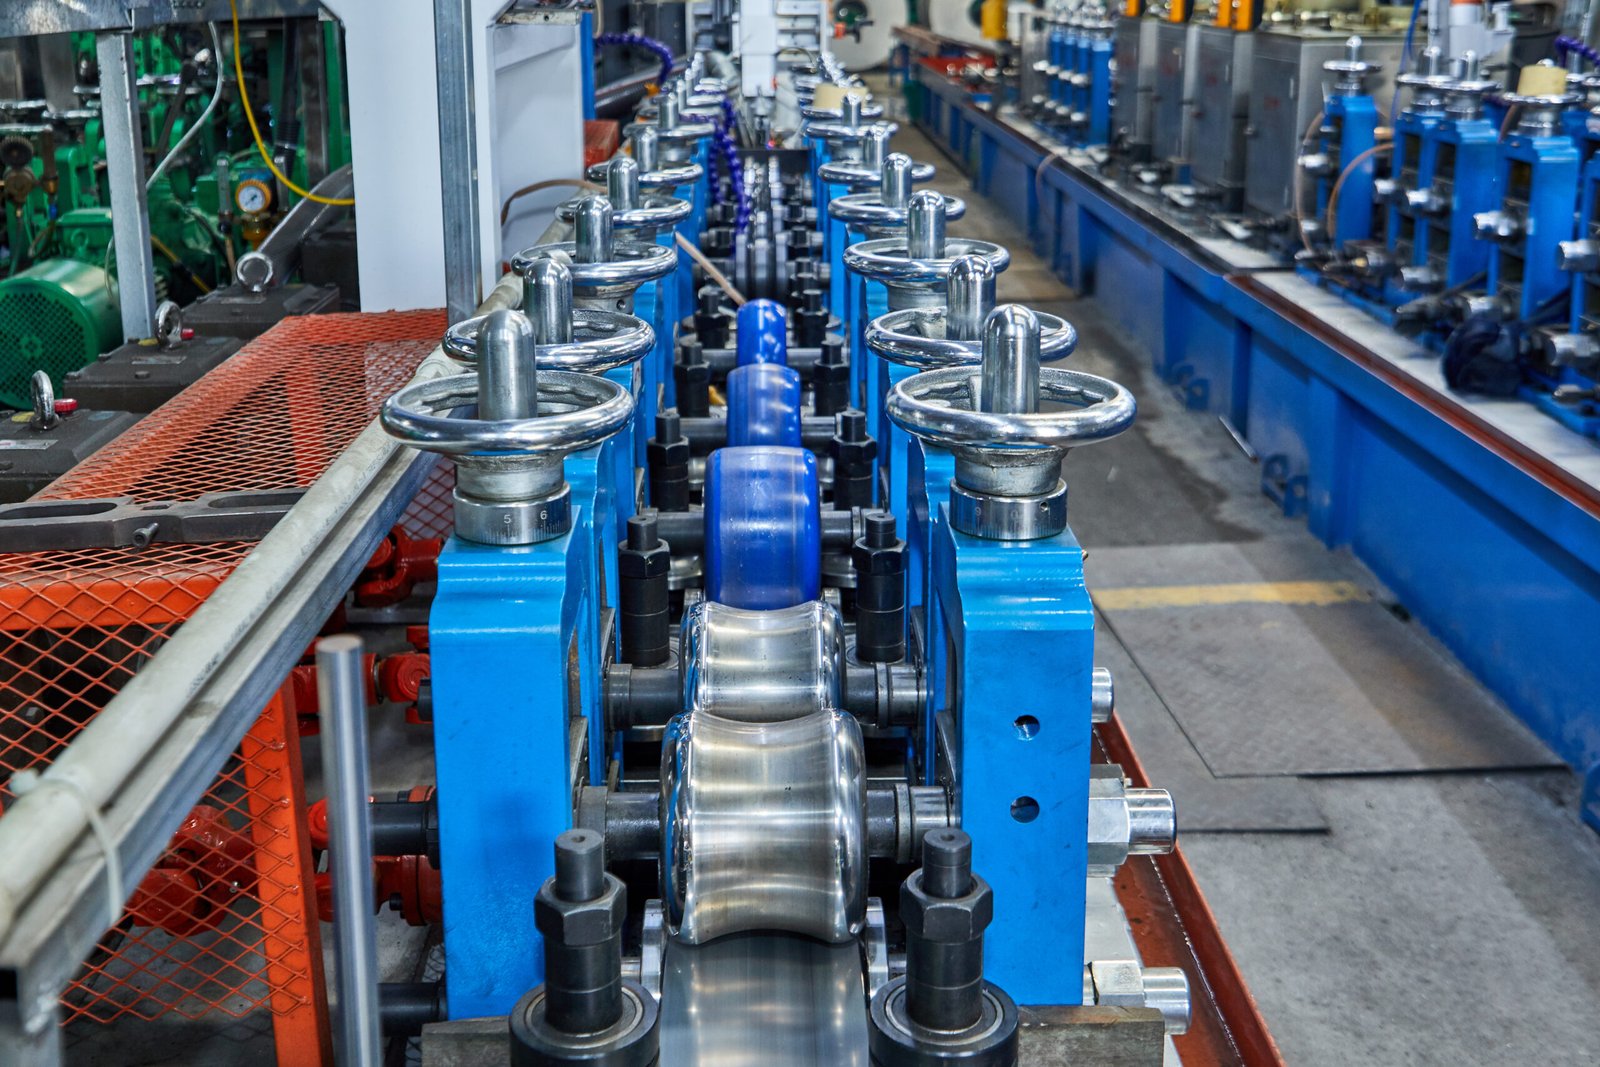
The Critical Role of Tooling Management
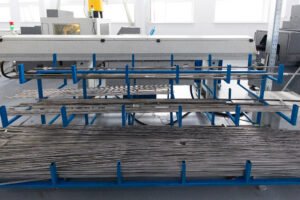
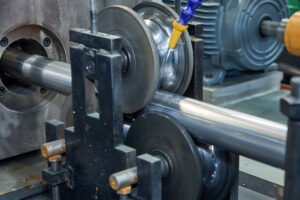
The rolls in your tube mill are not just guiding the strip; they are the primary tools that form the tube and present the edges for welding. No single element has a more direct impact on weld quality. Worn or improperly managed tooling is a direct cause of dozens of potential defects, from an open seam to off-center welds and incorrect tube shape. Therefore, a specific and rigorous tooling management strategy is a non-negotiable part of any prevention program.
This goes beyond simply replacing rolls when they break. It involves a lifecycle management approach. Each roll set should be cataloged and its usage hours tracked. At scheduled intervals, rolls should be taken off the mill for inspection, where their profiles are measured with a contour gauge. If they show wear beyond a specified tolerance, they must be reground to restore the original profile. Having multiple sets of tooling in rotation—one on the machine, one in the workshop for regrinding, and one ready in storage—is a key strategy. This ensures you are never forced to run with worn tooling just to keep production going.
We recognized this as such a critical factor that we engineered our machines, like the XZS heavy-duty tube mill, with quick-change tooling systems. This feature drastically reduces the downtime required to swap a roll set from hours to under an hour. This makes it far more likely that teams will adhere to their tooling PM schedule, as the "cost" of the changeover is significantly lower. A disciplined tooling management program, supported by machine design that makes it easy to execute, is arguably the single biggest lever you can pull to prevent a wide range of forming and welding defects.
| Tooling Checklist Item | Частота | Назначение | Consequence of Failure |
|---|---|---|---|
| Visual Inspection for Chips/Cracks | Daily (by Operator) | Catch catastrophic failures before they happen. | Damaged strip, unscheduled downtime. |
| Bearing Temperature/Vibration Check | Еженедельник | Detect bearing wear before it affects alignment. | Roll misalignment, inconsistent forming. |
| Roll Profile Measurement | Per Schedule (e.g., 500 operating hours) | Quantify wear against tolerance. | Incorrect tube shape, poor seam presentation. |
| Full Roll Set Regrind/Replacement | Per Schedule (e.g., 2000 operating hours) | Restore tooling to original specification. | Chronic forming and weld quality issues. |
| Alignment Check with Gauges | During Tool Change | Ensure all stands are perfectly aligned to centerline. | Wandering seam, twisted tubes. |
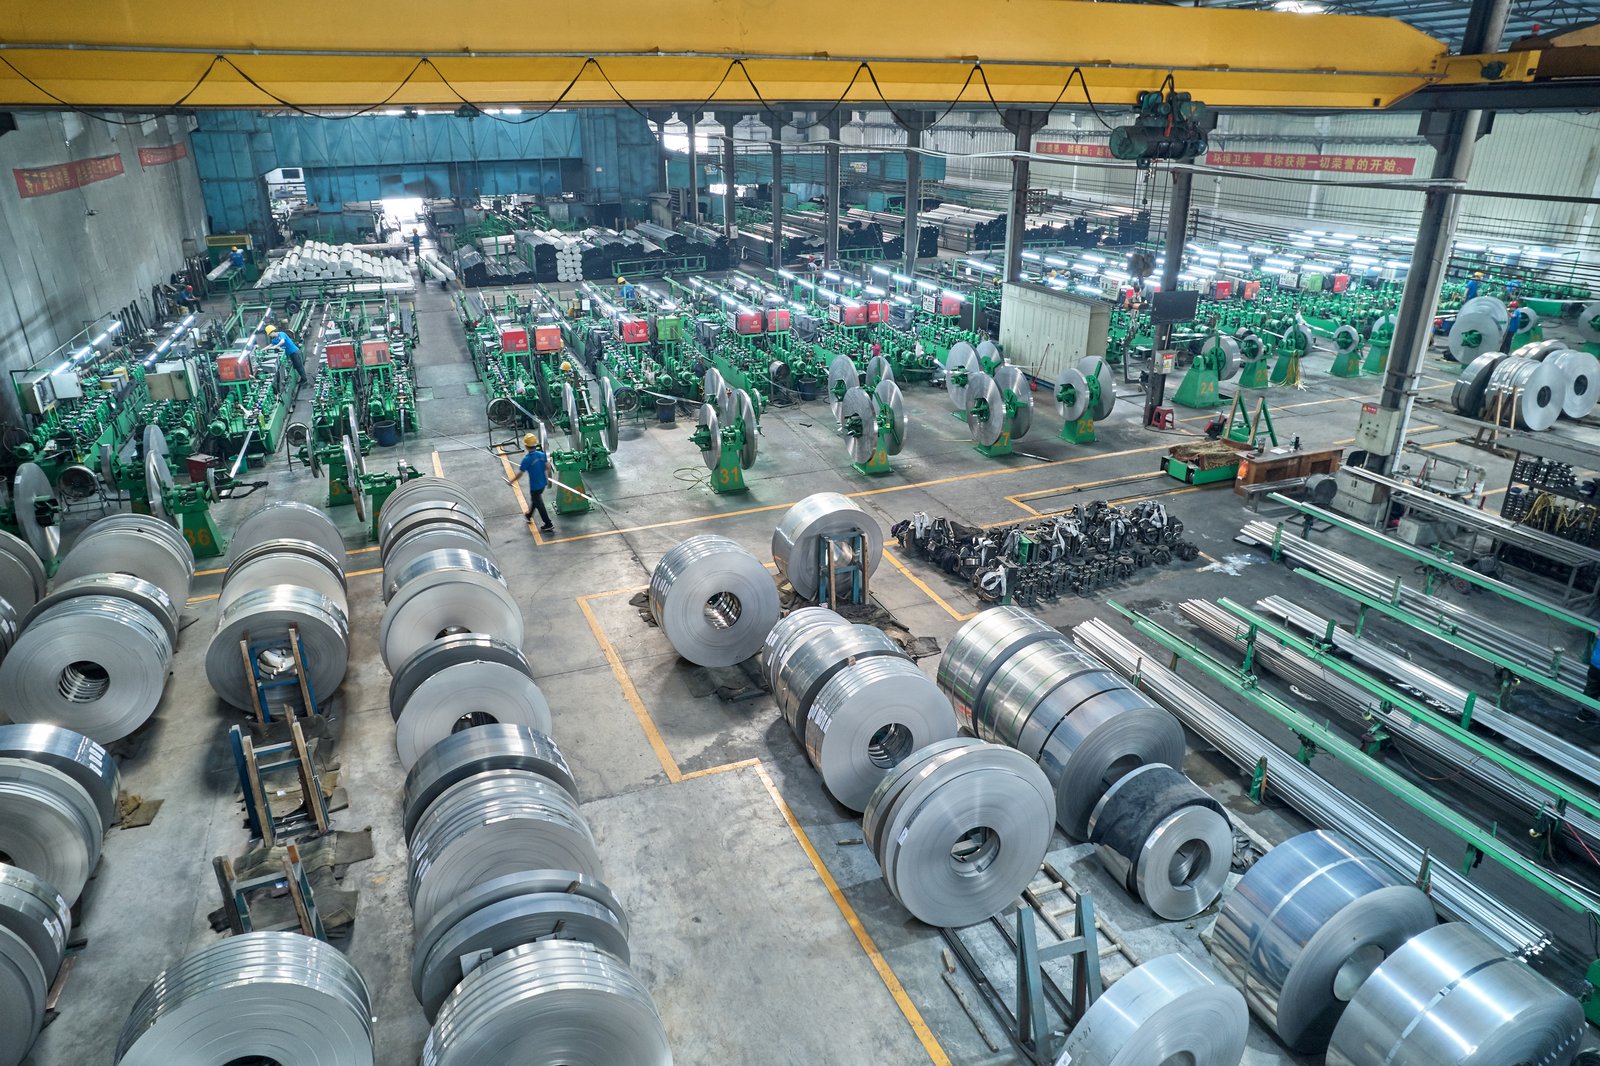
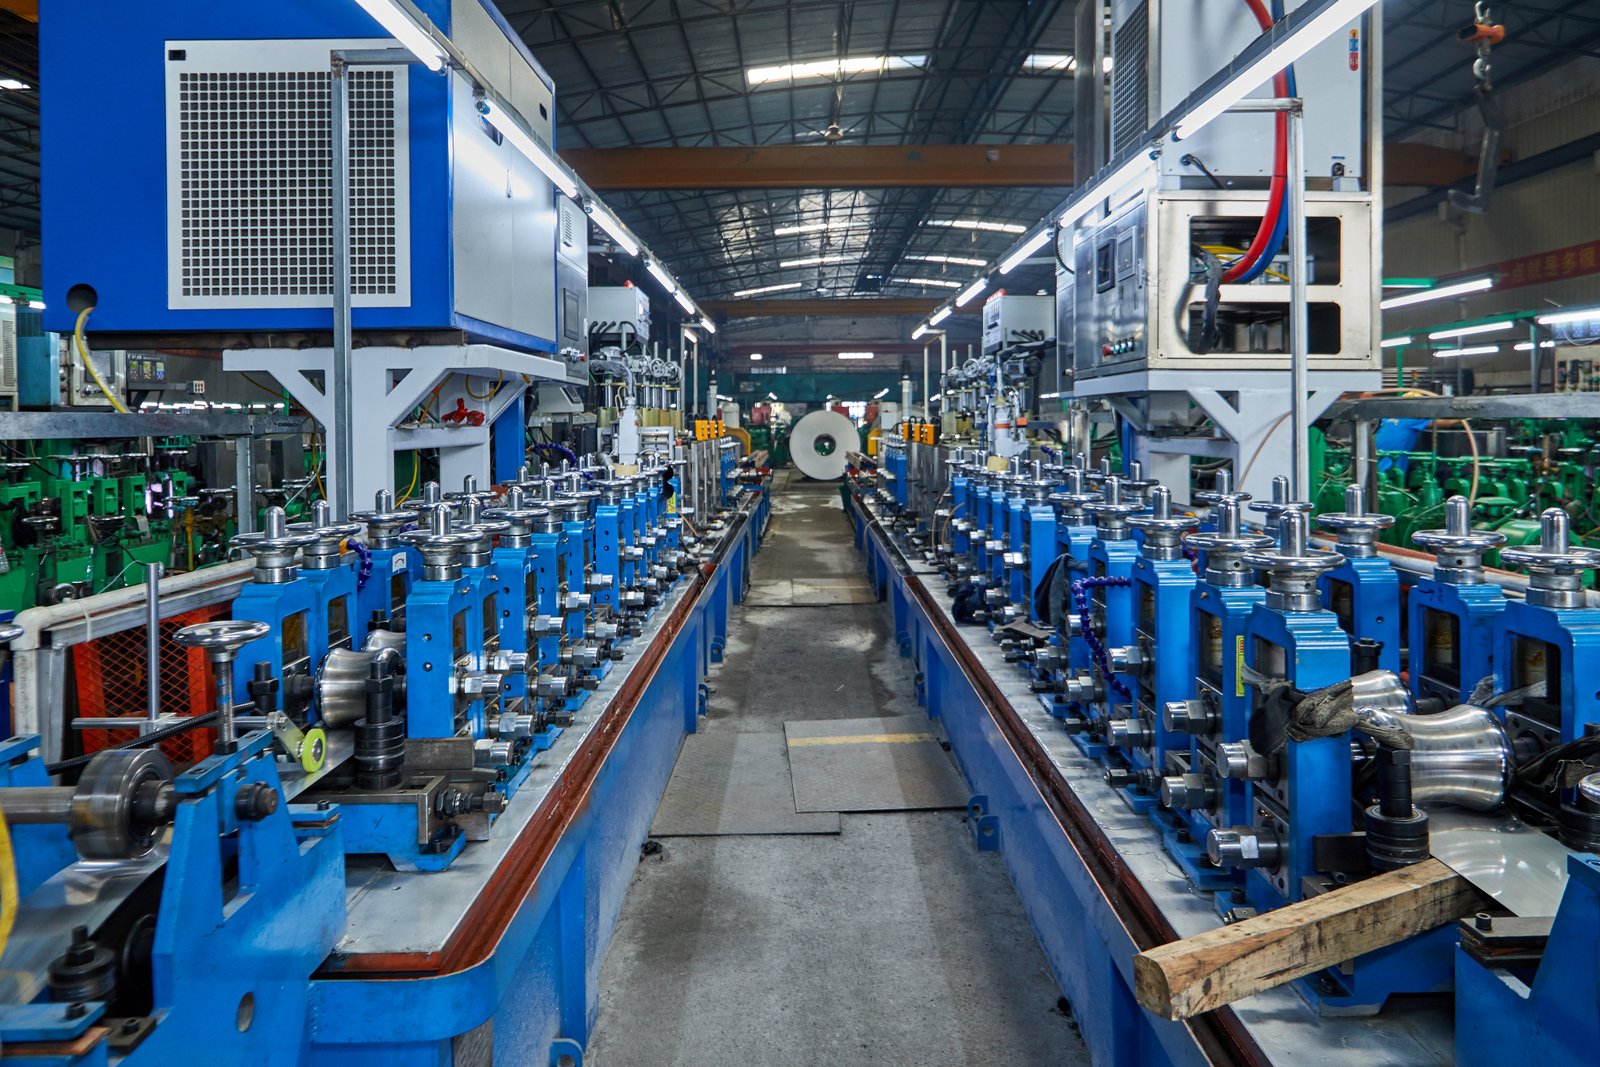
Investing in Automation and Process Stability
The final pillar of prevention is reducing human-dependent variability through automation and investing in machinery that is inherently stable. Even with the best training and procedures, human operators can have inconsistencies. An automated system, however, will execute a command with the exact same parameters every single time. This is why we've focused on integrating fully automated PLC + touch-screen controls into all our intelligent precision production lines. The operator can load a pre-programmed recipe for a specific tube size and grade, and the system automatically sets critical parameters like line speed and HF welder power. This eliminates setup errors and ensures perfect repeatability from shift to shift.
Process stability also comes from the fundamental design of the machine. Our commitment to using heavy, robust frames precision-machined by CNC centers is a core part of this philosophy. A less rigid frame can flex or vibrate under load, leading to constant, minute changes in alignment that create a state of permanent process instability. Furthermore, our focus on high-efficiency, energy-saving HF welding units provides a more stable power output, which translates directly to a more consistent welding temperature and a more reliable forge weld.
I recall a major EPC contractor in the building materials space who upgraded from an older, manually controlled mill to one of our automated lines. They were not just buying a new machine; they were buying process stability. Their defect rate, which was primarily driven by setup errors and operator variability, dropped by over 30% in the first six months. The machine's precision tolerance of ≤ ±0.05 mm and high material utilization of 98% were not just marketing specifications; they were the direct results of a system designed from the ground up to prevent defects by minimizing variability. Investing in this level of automation and stability is the ultimate preventive measure.
Заключение
Ultimately, mastering weld defect troubleshooting is a journey from reactive repair to proactive prevention. Fast diagnosis is a vital skill, but building resilient, profitable operations truly depends on combining robust maintenance, disciplined tooling management, and an investment in stable, automated machinery that controls process variables by design.
-
Understand how fitness-for-service principles impact weld defect evaluation and end-use decisions ↩
-
Reference detailed defect limits and quality requirements for building frame tubing under ASTM A500 ↩
-
See strict acceptance criteria for planar flaws in high-pressure oil and gas pipeline applications ↩
-
See how a Fishbone diagram visually organizes possible root causes of weld defects for teams ↩
-
Deepen your understanding of lean principles and their role in continuous process improvement ↩
-
Discover how machine data and industry 4.0 technology enhance defect analysis and prevention ↩
-
Understand immediate actions for stopping defects from reaching customers ↩
-
Learn to differentiate permanent solutions from temporary fixes ↩
-
Get sample templates and best practices for CAPA documentation ↩
-
Explore common destructive tests and what they reveal about weld integrity ↩
-
Discover actionable PM routines and how they directly prevent downtime and weld defects ↩