Essential Maintenance Tips for Your Stainless Steel Pipe Machine

Are you constantly worried about unexpected downtime and the high cost of repairs for your stainless steel pipe machine? The frustration of a sudden breakdown during a crucial production run can halt operations, waste valuable materials, and delay customer orders, ultimately hurting your bottom line and reputation.
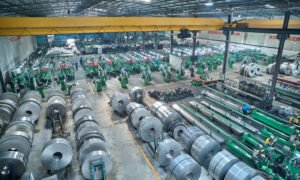
Essential maintenance for a stainless steel pipe machine involves a structured, proactive regimen of preparation, inspection, cleaning, lubrication, and final operational checks. This comprehensive approach is crucial for preventing unexpected breakdowns, ensuring consistent high-quality output, maximizing material utilization, and extending the machine's overall operational lifespan.
Over my 15 years in this industry at XZS, I've seen firsthand that the difference between a profitable tube mill and a problematic one often comes down to one thing: maintenance. It's not the most glamorous part of the job, but overlooking it is the fastest way to erode profits. A well-maintained machine is a reliable, predictable asset. We’ll walk through the essential steps to transform your maintenance routine from a reactive chore into a strategic advantage, ensuring your investment continues to pay dividends for years to come.
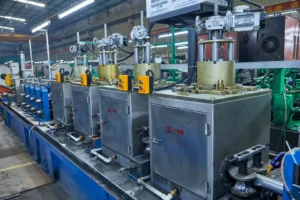
Moving beyond simple repairs requires a shift in mindset—from reactive "firefighting" to a proactive, and even predictive, maintenance culture. Reactive maintenance, where you fix things only after they break, is demonstrably the most expensive approach. A study by the U.S. Department of Energy1 found that a well-implemented proactive maintenance program can reduce costs by 12% to 18% compared to a reactive program. This is achieved by scheduling downtime on your terms and replacing components before they fail catastrophically. The next level, predictive maintenance, uses data from sensors to forecast failures. At XZS, we design our machines like the Intelligent Precision Stainless-Steel Welding-Pipe Production Line with this philosophy in mind—using robust, CNC-machined frames and accessible components to make proactive inspections and servicing as straightforward as possible, laying the groundwork for a truly modern, efficient operation.
How to prepare for the maintenance of stainless steel pipe machines?
Starting a maintenance job without a clear plan is a recipe for chaos and inefficiency. You risk overlooking critical steps, using the wrong tools, or even creating safety hazards for your team. This disorganization extends downtime and can lead to a superficial check that misses an underlying problem.
Proper preparation for stainless steel pipe machine maintenance is a safety-critical first step. It requires completely powering down and initiating Lockout/Tagout (LOTO) procedures, gathering all specified tools and lubricants, reviewing the OEM manual and maintenance logs, and preparing a detailed, task-specific checklist.
Before a single wrench is turned, establishing a fortress of safety is paramount. I recall an incident early in my career at a partner's facility where a technician narrowly avoided serious injury because a machine was accidentally started during service. That experience solidified my belief, and our policy at XZS, that safety isn't optional. It’s the foundation of effective maintenance. This preparatory stage isn't just about ticking boxes; it's about creating a controlled environment where your team can work methodically and safely. It’s about respecting the power of the machinery and the well-being of the people who operate it. By taking the time to prepare correctly, you ensure that the entire maintenance process that follows will be more efficient, thorough, and ultimately, more effective in preserving the health of your machine.
The preparation phase sets the tone for the entire maintenance cycle. It’s a deliberate process that transforms a potentially hazardous task into a structured, efficient, and value-adding activity. A well-prepared team is an effective team, capable of executing maintenance tasks with precision and confidence. It minimizes downtime not just by being faster, but by being more thorough and preventing the rework that stems from a rushed or disorganized approach. Let's delve into the three pillars of world-class maintenance preparation: establishing uncompromising safety, assembling the right tools, and developing a data-driven plan. These elements work in concert to create a framework for success.
Establishing a Comprehensive Safety Protocol
The absolute, non-negotiable first step is ensuring the machine is completely de-energized and cannot be turned on accidentally. This is achieved through a formal Lockout/Tagout (LOTO) procedure, a standard mandated by safety bodies like OSHA in the United States2. This involves shutting down the machine, isolating it from its energy source (electrical, pneumatic, hydraulic), and placing a lock and tag on the isolation device. Each technician involved should have their own lock to ensure the power cannot be restored until everyone is clear. I’ve seen cheap imitations of this process fail; a simple "Maintenance in Progress" sign is not enough. A physical lock is the only guarantee of safety.
Beyond LOTO, a full assessment of Personal Protective Equipment (PPE) is critical. For pipe mill maintenance, this typically includes impact-resistant safety glasses, steel-toed boots, and cut-resistant gloves, especially when handling rollers or cutting blades. The work area itself must also be prepared. This means clearing away all finished tubes, raw materials, and stray tools from around the machine to create an unobstructed workspace. A client of ours in Brazil was experiencing frequent minor slips and trips in their plant. After we helped them implement a strict pre-maintenance "clear zone" protocol, their safety record improved dramatically, and their maintenance tasks were completed 15% faster due to better organization.
Finally, ensure adequate lighting and ventilation, particularly if chemical cleaning agents will be used. A safe environment is a prerequisite for quality work. You cannot expect a technician to perform a detailed inspection or a precise adjustment in a poorly lit or hazardous space. Investing in proper safety protocols is a direct investment in your people and the quality of your maintenance program.
Assembling the Essential Maintenance Toolkit
Working with the wrong tools is not only inefficient but can also cause significant damage to your equipment. Imagine using an adjustable wrench on a precision-hardened bolt; you risk stripping the bolt head, making future removal a nightmare and compromising the component's integrity. A professional maintenance toolkit must be assembled with precision in mind. This includes a full set of metric and imperial wrenches and socket sets, calibrated torque wrenches for tightening bolts to manufacturer specifications, a complete set of Allen keys, and specialized tools like bearing pullers or feeler gauges.
Documentation is a tool in itself. Having the original equipment manufacturer (OEM) manual on hand is crucial. At XZS, we provide an exhaustive manual with every machine, detailing torque specifications, lubricant types, and component diagrams. This document is your ultimate source of truth. Alongside the manual, you need the machine's maintenance logbook. This log should record every service action, every part replaced, and every observation made. It is an invaluable historical record that helps you identify recurring issues and track the wear and tear of critical components.
Your tool kit should also include consumables required for the job. This means having the correct grades of lubricating oil and grease, non-corrosive cleaning solvents, and a supply of lint-free cloths to prevent contamination of sensitive parts like bearings. Having everything you need organized on a mobile tool cart before you begin prevents wasted time searching for items and keeps the process flowing smoothly.
Developing a Data-Driven Maintenance Checklist
A generic, one-size-fits-all checklist is better than nothing, but a truly effective checklist is a living document, tailored to your specific machine, its age, its usage intensity, and the environment it operates in. Start with the OEM's recommended maintenance schedule and then customize it based on your own operational data and experience. For instance, if your XZS Heavy-Duty Tube Mill is running 24/7 with abrasive materials, your roller inspection frequency should be much higher than that of a machine running a single shift with standard stainless steel.
Your checklist should be detailed and action-oriented, not vague. Instead of "Check Rollers," it should say, "Visually inspect forming rollers #1-4 for chipping or abnormal wear; measure roller gap with feeler gauge and compare to logbook." This level of detail ensures consistency, no matter which technician is performing the task. We encourage our clients to structure their checklists by frequency, a practice that builds a scalable maintenance routine.
This data-driven approach is what separates basic maintenance from strategic asset management. A client of ours in India, a large automotive exhaust manufacturer, used their detailed checklists and maintenance logs to spot a trend of escalating temperatures in a key gearbox. Their data allowed them to schedule a replacement during a planned shutdown, avoiding an estimated 48 hours of catastrophic, unplanned downtime. The checklist is not just a to-do list; it is a data collection tool that empowers you to move from reactive to predictive maintenance.
| Frequency | Task | Check Point | Status (OK/Action Needed) | Notes |
|---|---|---|---|---|
| Daily | Forming & Sizing Rollers | Visual inspection for wear, damage, or debris buildup. | Note any asymmetry or scoring. | |
| Daily | Welding Unit & Impeder | Check HF contacts for wear; verify coolant flow. | Coolant must be clear and flowing. | |
| Weekly | Drive Chains & Belts | Check tension and signs of stretching or wear. | Adjust tension as per manual. | |
| Weekly | Gearbox & Drive Motor | Check lubricant levels via sight glass; listen for noise. | Top up oil if necessary. | |
| Monthly | Machine Frame & Fasteners | Check critical bolts for correct torque. | Use a calibrated torque wrench. | |
| Monthly | Electrical Cabinet | Inspect and clean air intake filters; check connections. | Power must be fully locked out. |
Proactive maintenance reduces costsTrue
Studies show proactive maintenance programs can reduce costs by 12-18% compared to reactive approaches.
LOTO requires just a warning signFalse
Proper Lockout/Tagout requires physical locks on energy sources, not just warning signs.
What are the initial steps to inspect your stainless steel pipe machine?
After a long production run, it's easy to just shut the machine down and walk away. But hidden problems like a hairline crack in a roller or a faint whine from a gearbox are developing silently. Ignoring these subtle cues is a gamble you can't afford to take.
The initial inspection of a stainless steel pipe machine involves a multi-sensory approach: a systematic visual walk-around of all sections, actively listening for abnormal operational sounds like grinding or squealing, and carefully checking for unusual vibrations or excessive heat in motors and bearings.
This is where an operator's intuition, honed over time, becomes a powerful diagnostic tool. The best technicians I’ve met can walk into a noisy factory and tell you immediately if a specific machine sounds "off." This isn't magic; it's a skill born from diligent and repeated inspection. They have established a baseline for what "normal" looks, sounds, and feels like. This initial inspection is your first line of defense, allowing you to catch issues when they are small, easy, and inexpensive to fix, long before they escalate into production-stopping failures. It’s a process of familiarization that turns you from a simple operator into the machine’s most trusted guardian. Let's break down how you can systematically develop this crucial skill across the entire production line.
A thorough initial inspection is fundamentally about detective work. You are looking for clues that deviate from the machine's normal operating state. A small, seemingly insignificant detail can often be the leading indicator of a much larger underlying problem. For this process to be effective, it must be structured and comprehensive, covering every critical system from the uncoiler to the final cutting unit. A haphazard glance is not an inspection. You must engage multiple senses—sight, hearing, and touch (safely, of course)—to build a complete picture of the machine's health. This disciplined approach ensures that nothing is missed and provides the foundational data needed for any subsequent maintenance actions. We will now explore the specific visual, auditory, tactile, and structural checks that form the core of a professional initial inspection routine.
The Visual Walk-Around: More Than Just a Glance
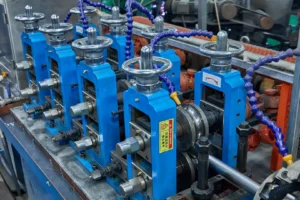
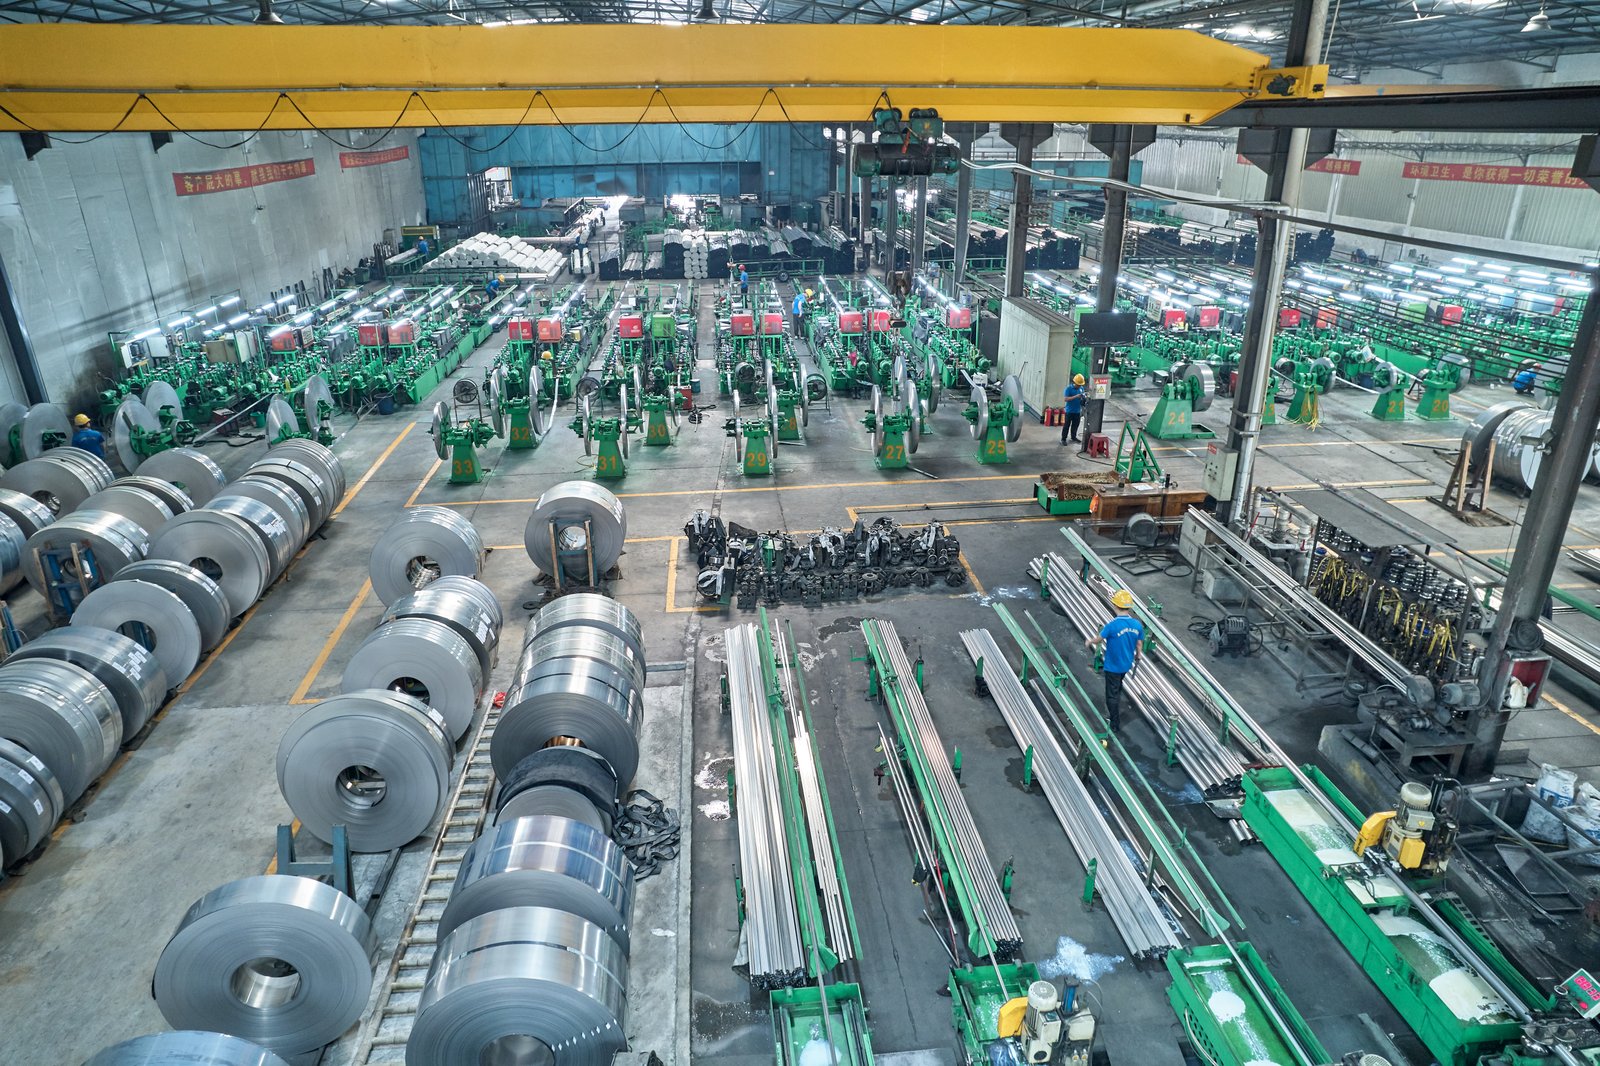
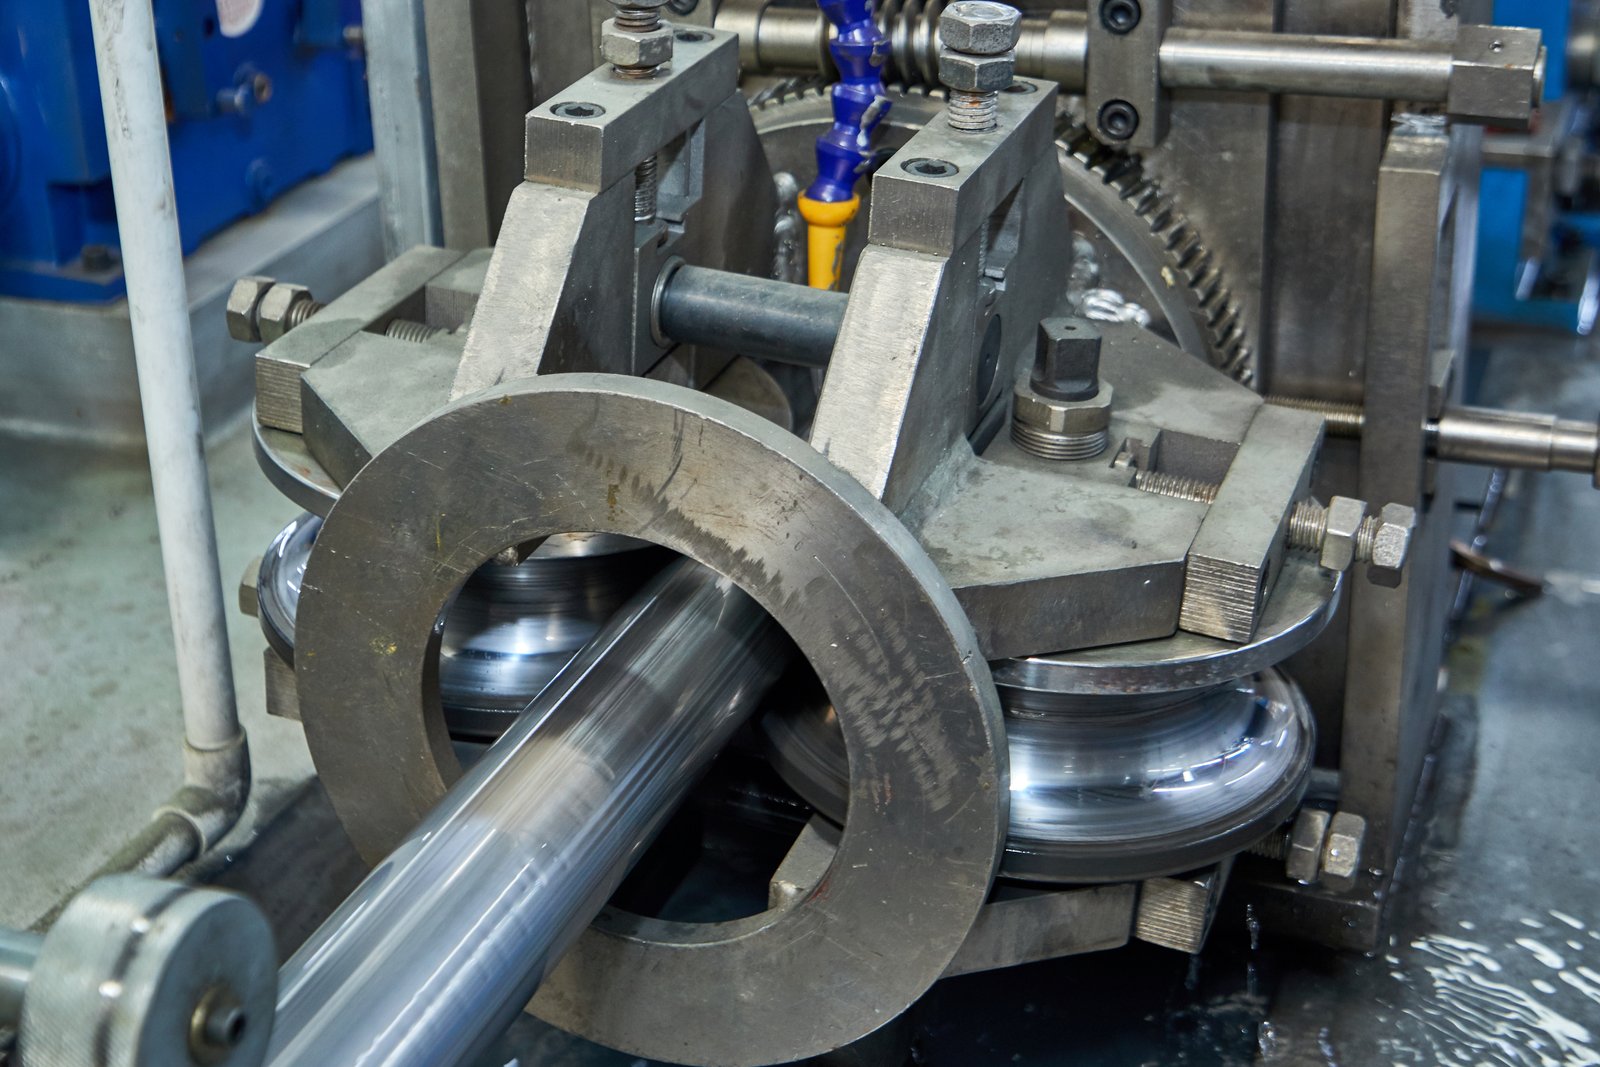
A proper visual inspection is a methodical tour with a purpose. Start at the beginning of the line and work your way to the end, examining each section systematically. In the Forming Section3, look closely at each set of rollers. You are searching for signs of uneven wear, scoring, chips, or any build-up of metallic debris. Uneven roller wear is a direct cause of poor seam quality and out-of-spec pipe dimensions. A slight misalignment here can ripple through the entire process. At XZS, our rollers are engineered for high wear resistance, but even the best materials require regular inspection.
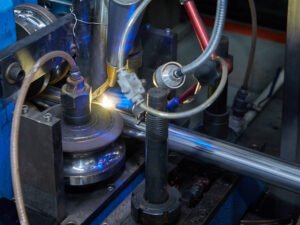
Next, move to the Welding Section4. This is a high-stress area. Inspect the high-frequency contacts for pitting or wear, as this can lead to inefficient power transfer and weak welds. Check the impeder coil for any signs of damage or degradation. Critically, trace all coolant lines connected to the welding unit, looking for leaks, kinks, or cloudiness in the fluid. A loss of coolant flow can destroy an expensive welding head in seconds. In the Sizing and Straightening Sections, the inspection mirrors the forming section—look for roller integrity and alignment. Misaligned sizing or straightening rolls can induce unnecessary stress into the finished pipe, compromising its structural integrity. Finally, at the Cutting Unit, inspect the saw blade or cutting wheel. Look for chipped teeth, cracks, or signs of dullness. A dull blade produces a rough cut with excessive burrs, requiring secondary finishing operations that increase cost and labor.
Auditory and Tactile Diagnostics: Listening to Your Machine
With the machine running (and all safety guards in place), turn your attention from seeing to listening. A healthy pipe mill has a consistent, rhythmic hum. Any deviation from this baseline is a call for investigation. A high-pitched, intermittent squeal often points to a dry or failing bearing that requires immediate lubrication or replacement. A low, constant grinding or rumbling sound could indicate worn gears inside a gearbox or a problem with the main drive motor. Listen for rhythmic clanking or ticking noises, which can signal a loose drive chain, a misaligned coupling, or a foreign object caught somewhere in the mechanism.
Tactile checks provide another layer of data, but they must be performed with extreme caution. The goal is to detect abnormal heat or vibration. An infrared thermometer is the safest and most accurate tool for this. Point it at motor housings, gearboxes, and bearing blocks. Compare the readings to the machine's specifications or its normal operating temperature. A significant temperature spike is a definitive sign of excessive friction, likely due to lubrication failure or misalignment. A client of ours, a major producer of sanitary-ware tubes in Southeast Asia, invested in a simple handheld IR thermometer. Within a week, they identified an overheating bearing on their sizing mill that wasn't yet making any audible noise. This early detection saved them from a shaft-damaging failure that would have cost them tens of thousands of dollars and a week of downtime. Similarly, you can carefully feel for excessive vibration in the machine frame, which can indicate an imbalance in the rotating components.
Structural and Fluid System Integrity Checks
The foundation of any high-precision machine is its structural integrity. During your walk-around, pay close attention to the machine's main frame. Look for any signs of stress, such as paint flaking around joints which could indicate flexing, or hairline cracks in welds, especially near high-load areas like the main drive mounts. Check all foundation bolts to ensure they are tight and the machine is securely anchored. Our XZS machine frames are CNC-machined from solid stock for maximum rigidity, a feature designed to provide a stable platform for decades. However, even the most robust frame can be compromised by a loose bolt or a cracked foundation.
Alongside the structure, a thorough check of all fluid systems is essential. This is a simple but frequently overlooked task. Visually inspect the sight glasses on all gearboxes and hydraulic reservoirs. The fluid should be at the recommended level and appear clean. Milky or cloudy hydraulic oil, for example, is a clear sign of water contamination, which severely degrades lubricating properties and can lead to pump failure. For the welding coolant system, check the level in the reservoir and ensure the fluid is bright and clear, not murky.
Finally, a quick but important check of the electrical system is warranted. Visually inspect power cables for any signs of fraying or damage. If your safety protocols allow, a quick look inside the main electrical cabinet (with the power on but from a safe distance) can be revealing. Check that all cooling fans are operating correctly. Overheating is the enemy of electronics, and a simple failed fan can lead to a costly VFD (Variable Frequency Drive) or PLC (Programmable Logic Controller) failure.
Initial inspection uses multiple sensesTrue
A proper initial inspection involves visual, auditory, and tactile checks to comprehensively assess machine condition.
Visual inspection should be randomFalse
Visual inspection must be systematic, starting from the beginning of the line and moving section by section.
How to effectively clean the components of your stainless steel pipe machine?
It's easy to think of cleaning as a janitorial task, but on a precision machine, it's a critical maintenance function. A buildup of metallic dust, grease, and grime can mask serious issues like cracks, interfere with sensors, and accelerate the wear of moving parts.
Effective cleaning of a stainless steel pipe machine involves using the right methods and materials for each component—removing abrasive debris from rollers and guides, ensuring electrical cabinets are free of dust, and keeping sensor pathways clear to ensure reliable, high-quality production.
Simply blasting everything with a high-pressure air hose is a common but dangerous mistake. This can drive fine metallic particles deep into bearings and electrical components, causing more harm than good. I've seen entire control boards shorted out by this practice. A proper cleaning regimen is targeted and methodical. It improves the machine's lifespan, ensures the accuracy of your finished product, and is a vital part of your inspection process—you can't inspect what you can't see. Let's explore the professional approach to cleaning the different systems of your pipe mill.

Cleaning is inspection. As you meticulously remove layers of operational residue, you unveil the true state of the machine's components. This process provides an unparalleled opportunity for close-up examination, revealing hairline fractures, subtle wear patterns, and loose fittings that would otherwise go unnoticed. It is not merely about aesthetics; it is a fundamental step in proactive asset management. A clean machine runs more efficiently, as heat can dissipate properly from motors and electronics. It runs more reliably, as sensors can function without obstruction. And it is safer to operate and maintain. The following deep dive will outline the specific techniques and considerations for cleaning the mechanical, electrical, and precision components of your tube mill, ensuring that this essential task contributes directly to your operational excellence.
Cleaning Mechanical and Drive Systems
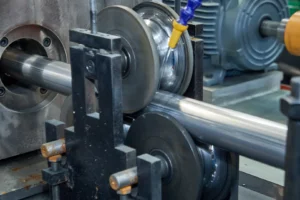
The heart of your pipe mill's mechanical systems—rollers, chains, gears, and guides—is constantly exposed to metal fines, lubricant overspray, and coolant residue. This abrasive slurry is a primary cause of premature wear. The goal is to remove this contamination without causing damage. For forming, sizing, and straightening rollers, avoid using hard metal scrapers that can scratch their precision-ground surfaces. Instead, use brass scrapers or stiff-bristled non-metallic brushes along with an approved, non-corrosive industrial solvent5. After loosening the grime, wipe the rollers clean with lint-free cloths. This is the perfect time to inspect the roller surface closely for any pitting or damage6 that was previously hidden.
Drive chains and open gears require a similar approach. A buildup of old, gritty grease needs to be completely removed before new lubricant is applied. A degreasing solvent and brush work best here. Once the chain or gear is clean, you can properly inspect for stretched links, worn teeth, or sign of misalignment7. This is a task often overlooked. A customer producing furniture tubes was complaining about inconsistent product length from their cutting unit. The issue wasn't the cutter itself, but a dirty, poorly lubricated drive chain that was causing jerky, inconsistent feeding of the pipe. A thorough cleaning and lubrication regimen solved the problem and improved their cutting tolerance significantly.
Finally, don't forget the machine bed and frame. Large accumulations of swarf and dirt can trap moisture, leading to corrosion over time. Regular sweeping and wiping down of the entire machine structure not only improves its appearance but also protects your long-term investment. At XZS, we design our machines with smooth surfaces and minimal dirt traps to make this essential housekeeping task as easy as possible.
Decontamination of Electrical and Control Cabinets
Electrical components are uniquely vulnerable to contamination, and their cleaning requires a completely different approach from mechanical parts. The primary enemies here are dust and moisture. Dust, especially metallic dust, is conductive and can cause short circuits across terminals or circuit boards. It also acts as an insulating blanket, preventing electronic components like VFDs, PLCs, and power supplies from dissipating heat effectively, leading to overheating and premature failure.
The cleaning process must be dry. Never use water or liquid solvents inside an electrical cabinet. The first step, with the power locked out, is to use a vacuum cleaner with a small, non-metallic brush attachment to gently remove the bulk of the accumulated dust. For finer cleaning between components and on circuit boards, use a can of compressed air designed for electronics. Hold the can upright to prevent the liquid propellant from spraying out, which can cause thermal shock and damage sensitive chips.
Pay special attention to the cooling fan intakes and filters on the cabinet doors. These are your system's lungs. If they are clogged, the entire cabinet will slowly cook itself. Filters should be removed and either washed (if they are the reusable foam type) or replaced. A manufacturer of automotive heat exchangers in the US we work with has integrated a "cabinet filter check" into their daily startup procedure. This simple, two-minute task has eliminated what used to be their number one cause of electronic failures, saving them thousands in replacement parts and lost production.
Ensuring the Clarity of Sensors and Precision Surfaces
Modern tube mills are packed with sensors that provide critical feedback to the control system. These include proximity switches that detect material presence, laser micrometers that measure pipe diameter in real-time, and eddy current testers that inspect for weld defects. The accuracy of your entire operation relies on these sensors having a clear, unobstructed view. A thin film of oil or a small speck of dirt on a laser lens can throw off your diameter readings, leading to an entire production run of out-of-spec product.
Cleaning these components requires the utmost care. For optical sensors like lasers or cameras, use a dedicated lens cleaning solution and a microfiber cloth, the same type you would use for a high-end camera lens. For non-contact proximity or eddy current sensors, a simple wipe with a clean, dry cloth is usually sufficient. The goal is to remove any residue without scratching or misaligning the sensor.
This principle extends to other precision surfaces, such as the ways on which the cutting unit travels or the reference surfaces used for aligning roller stands. These need to be wiped clean to ensure smooth movement and accurate setup. One of our clients producing high-purity stainless steel tubes for the food and beverage industry found that small inconsistencies in their wall thickness were being caused by a slight buildup on the guide rails of their sizing section. Incorporating a daily wipe-down of these surfaces into their routine tightened their tolerances and improved their overall product quality, a key selling point in their competitive market.
Cleaning reveals hidden machine issuesTrue
Proper cleaning exposes hairline fractures and wear patterns that would otherwise remain hidden under operational residue.
High-pressure air cleans electrical cabinetsFalse
High-pressure air can drive metallic particles deeper into sensitive components; vacuuming with non-metallic brushes is the correct method.
What steps should be taken to lubricate the stainless steel pipe machine?
You've cleaned the machine, but now it's vulnerable. Running clean but dry components is one of the fastest ways to cause catastrophic failure. Friction becomes the enemy, generating heat, causing accelerated wear, and driving up energy consumption.
Lubricating a stainless steel pipe machine requires a systematic approach: identifying all lubrication points from the OEM manual, selecting the correct type of lubricant (oil vs. grease) for each application, applying the right amount, and adhering to a strict, documented schedule.
More is not better. Over-lubricating can be just as damaging as under-lubricating, as excess grease attracts abrasive contaminants and can blow out bearing seals. The key is precision. I’ve seen thousand-dollar bearings destroyed in a week, not from lack of grease, but from being pumped with the wrong type of grease by a well-intentioned but untrained technician. Proper lubrication is a science that reduces friction, dissipates heat, and prevents corrosion—three pillars that support the longevity and performance of your investment.
Lubrication is the lifeblood of any mechanical system. It is the thin film of oil or grease that stands between a machine running smoothly for 100,000 hours and one that seizes up in 100. A disciplined lubrication strategy is one of the highest-return activities in any maintenance program. It directly impacts everything from energy consumption to component lifespan and overall machine reliability. A well-lubricated machine runs cooler, quieter, and with less effort, which translates to lower power bills and fewer breakdowns. The process, however, demands precision and knowledge. It's about delivering the right lubricant, to the right place, at the right time, and in the right quantity. This deep dive will cover how to identify lubrication needs, select the appropriate products, and establish a robust application schedule to keep your pipe mill in peak condition.
Identifying Lubrication Points and Selecting the Correct Lubricant
The first step is to create a lubrication map8 of your machine. Your primary reference should be the OEM manual provided by the manufacturer. At XZS, our manuals include detailed diagrams that pinpoint every single lubrication point, from the main gearbox oil reservoir to the smallest grease nipple on a roller shaft bearing. If a manual is lost, you must conduct a physical survey, tracing the drive systems and identifying every bearing block, gearbox, enclosed chain, and sliding way. Each of these points will be fitted with either a grease nipple (zerk fitting), an oil cup, or will be part of a sealed reservoir with a fill/drain plug.
Choosing the correct lubricant is equally critical and is not a place for guesswork. Lubricants are highly engineered products with specific properties. Using a general-purpose grease where a high-temperature, high-pressure EP (Extreme Pressure) grease is specified will lead to rapid breakdown and failure. Your OEM manual will specify the required lubricant type by its properties (e.g., ISO VG 320 gear oil, NLGI #2 lithium complex grease). It is imperative to use a product that meets or exceeds these specifications. We once consulted for a large-diameter pipe producer in the Middle East whose maintenance costs were skyrocketing. We discovered they were using a single type of grease for their entire plant to "simplify" inventory. After helping them implement a proper lubrication chart with seven different specified lubricants, their bearing failures dropped by over 80% within a year.
It's also crucial to store lubricants correctly. Keep them in sealed, clearly labeled containers in a clean, dry area to prevent contamination from dirt or water, which can render them useless.
The Science of Application: Oil vs. Grease and Quantity Control
Understanding the difference between oil and grease is fundamental. Oil is used for lubricating enclosed systems like gearboxes and chain cases where it can be contained in a sump and splash or circulate to coat components. It is also excellent at transferring heat away from the components. Grease, which is essentially oil suspended in a thickener (like a sponge holding water), is used in applications like roller bearings where a liquid lubricant would simply run out. The thickener holds the oil in place, releasing it slowly to lubricate the moving parts.
The quantity of lubricant applied is a science. For oil-filled gearboxes and reservoirs, there will be a sight glass or a dipstick. The rule is simple: fill to the indicated level and no higher. Overfilling a gearbox can cause the oil to foam, which drastically reduces its lubricating ability, and can lead to overheating and blown seals from excess pressure. When it comes to grease, the risk of over-application is even more common. Pumping a bearing full of grease until it purges from the seals is a frequent mistake. This can damage the seals, allowing contaminants to enter, and the churning of excess grease actually increases friction and heat. The correct procedure is to apply a specific, calculated amount of grease based on the bearing's size and speed. Many manufacturers provide formulas or charts for this. A good rule of thumb for manual greasing is to add grease slowly until you feel slight back-pressure on the grease gun.
Establishing and Documenting a Lubrication Schedule
Consistency is the key to successful lubrication. The only way to ensure this is through a formal, documented schedule. This schedule should be integrated into your overall maintenance plan and can be visualized on a chart posted near the machine or managed through a Computerized Maintenance Management System (CMMS)9. The schedule should list every lubrication point, the type of lubricant to use, the amount to apply, and the frequency (daily, weekly, monthly, quarterly).
For example, a typical schedule might look like this:
- Daily: Visually check oil levels in main gearboxes.
- Weekly: Manually grease all forming and sizing roller bearings (e.g., 2 shots per nipple).
- Monthly: Check and top up the oil in the cutting unit's hydraulic system.
- Quarterly: Drain, flush, and refill the high-frequency welder's enclosed coolant system.
- Annually: Drain and replace oil in all major gearboxes.
Documenting each action is just as important as performing it. Every time a point is lubricated, it should be logged with the date and the technician's initials. This creates an auditable trail and ensures accountability. This log also becomes a valuable diagnostic tool. If a particular bearing fails prematurely, you can review its lubrication history. Was it missed on a cycle? Was the wrong grease used? This data allows you to refine your schedule and practices for continuous improvement, turning lubrication from a routine task into a strategic element of your reliability program.
Over-lubrication damages bearingsTrue
Excess grease attracts contaminants and can blow out seals, leading to premature bearing failure.
One grease type suits all applicationsFalse
Different components require specific lubricants (e.g., high-temperature EP grease vs. general-purpose grease).
How to conduct final checks to ensure optimal performance of the pipe machine?
You've completed the maintenance: the machine is clean, inspected, and lubricated. But the job isn't done. Powering it on and immediately resuming full production is a risky move that could undo all your hard work if a single bolt was left untightened.
To ensure optimal performance after maintenance, final checks should include a pre-power-up safety sweep, a test run with no material, the production of a test pipe to verify dimensional accuracy (e.g., precision tolerance ≤ ±0.05 mm), and comprehensive documentation of all work performed.
This final phase is your quality control for the maintenance process itself. It’s the critical step that confirms your adjustments were correct and the machine is truly ready for reliable, high-quality production. I’ve seen teams skip this and pay the price—misaligned rollers gouging an entire coil of expensive stainless steel before anyone noticed. A methodical final check bridges the gap between maintenance work and profitable production.
The conclusion of maintenance is not the moment you put your tools away; it’s the moment you validate the effectiveness of your work. This verification phase is indispensable for preventing post-maintenance failures and ensuring that the machine returns to service in a state that is not just operational, but optimized. It’s about mitigating risk and guaranteeing that the primary objectives of the maintenance—improved reliability and quality output—have been achieved. A rushed startup can be just as costly as the initial problem you set out to fix. By following a structured sequence of checks, from initial power-up to the meticulous measurement of a test product, you are cementing the gains made during the maintenance window and ensuring a smooth, predictable return to full-scale, profitable operations.
Pre-Power-Up Safety Sweep and System Re-Energization
Before any power is restored, a comprehensive safety sweep of the entire work area is mandatory. This is the last chance to prevent a catastrophic mistake. Walk the entire length of the machine line with a checklist. First, verify that all tools, cleaning cloths, and spare parts have been removed from the machine. I once heard a story of a forgotten wrench left on a roller stand that was crushed on startup, damaging the roller and a gearbox. Second, confirm that all safety guards, covers, and panels that were removed for access have been securely reinstalled. Operating a machine with guards removed is a major safety violation and exposes operators to unacceptable risk.
Only after this physical sweep is complete can the Lockout/Tagout (LOTO) devices be removed, following the reverse procedure of their installation. The person who applied the lock is the only one who should remove it. Once all locks are removed, the machine can be re-energized. The startup itself should be sequential. Power up the main electrical system first, then the control system (PLC), and finally the hydraulic and pneumatic systems one by one. During this process, be vigilant. Listen for any unusual sounds like the "thump" of a contactor that doesn’t engage properly, and watch for any error messages on the control screen. This cautious, step-by-step re-energization allows you to catch any electrical or control issues before the powerful drive motors are even engaged.
No-Load Test Run and System Monitoring
With the machine powered on, the next step is to run it without any material. This is called a no-load or dry run. The purpose is to check the function of all moving parts in a controlled state. Engage the main drive and run the rollers at a low speed first, gradually increasing to normal operating speed. As the machine runs, walk the line and use your senses just as you did in the initial inspection. Listen for any new noises that weren't there before—squeals, rumbles, or clicks. Look for any signs of wobbling in the rollers or vibration in the frame.
This is also the prime opportunity to verify the function of all systems. Check that the welding coolant is circulating at the correct pressure and flow rate. Test the travel of the cutting unit back and forth to ensure it moves smoothly. Check the pressure gauges on the hydraulic and pneumatic systems to confirm they are holding steady at their specified operating pressures. For our XZS machines equipped with fully automated PLC + touch-screen control, this is the time to cycle through the diagnostic screens. Check for any new alerts and verify that sensor readings (e.g., motor amperage, speed feedback) are stable and within their normal no-load ranges. This test run confirms that the mechanical, electrical, and fluid systems are all working in harmony before you introduce the immense stress of forming and welding steel.
Production of a Test Pipe and Quality Verification
The ultimate proof of successful maintenance is the quality of the product it produces. Once the no-load run is complete and satisfactory, it is time to feed a test strip of stainless steel into the machine. Produce a short length of pipe—a few meters is usually sufficient. This first piece is the most critical one you will make all day. It must be subjected to a rigorous quality control inspection. First, perform a visual check of the weld seam. It should be consistent, smooth, and free of defects like pinholes or undercutting. The cut-off end should be clean and square, with minimal burrs.
Next, perform a battery of dimensional checks using calibrated instruments like digital calipers and micrometers. Measure the outside diameter (OD) at several points along the length and at different rotational orientations to check for roundness and consistency. Measure the wall thickness. For our clients using XZS Intelligent Precision lines, the expectation is clear: the final product tolerance must be ≤ ±0.05 mm. If the measurements are out of spec, the machine must be stopped, and the cause investigated. The issue is often a minor roller adjustment that is needed after reassembly.
Finally, document the results of this test piece in your maintenance log. Record the final dimensions and any adjustments made to achieve them. This data closes the feedback loop. It confirms the maintenance was successful and provides a new baseline for the machine's performance. By refusing to compromise on this final quality check, you guarantee that when you switch to full production, every meter of pipe you produce meets the high standards your customers expect.
Test runs should be done without materialTrue
No-load test runs help verify machine functionality before introducing production stress.
Immediate full production is safe after maintenanceFalse
Skipping verification steps risks undetected issues that could damage materials or equipment.
Conclusion
Ultimately, proactive and systematic maintenance is not a cost center; it's a strategic investment. This disciplined approach—from preparation to final checks—is the single most effective way to guarantee your stainless steel pipe machine's longevity, ensure consistent product quality, and secure your long-term operational profitability.
-
Discover cost savings of proactive over reactive maintenance methods ↩
-
Understand OSHA standards for machine safety protocols ↩
-
Learn how roller wear impacts seam quality and pipe dimensions ↩
-
Understand problems leading to weak welds in the welding section ↩
-
Discover options for cleaning solvents that won't harm machine parts ↩
-
Learn techniques to spot hidden machinery damage ↩
-
Understand the impact of misalignment on machine accuracy and lifespan ↩
-
Master the technique of mapping lubrication points in machines ↩
-
Discover how CMMS improves maintenance scheduling and tracking ↩