Troubleshooting Common Stainless Steel Pipe Machine Issues for Maximum Uptime

Unexpected downtime on your stainless steel pipe machine can halt production and bleed profits. Every minute the line is down, you're losing material, missing deadlines, and frustrating clients. With a systematic troubleshooting approach, you can quickly diagnose and resolve common issues, transforming costly downtime into a minor hiccup.
Troubleshooting common stainless steel pipe machine issues involves a systematic approach starting with a safety check, observing machine operations for abnormalities, reviewing error codes on the PLC, and consulting the operator's manual. This foundational process helps isolate the problem's source for efficient resolution and maximum uptime.
Before you can fix a problem, you need to understand its root cause. Rushing in with tools without a clear diagnostic path can often make things worse. In my 15 years at XZS, I've seen how a methodical approach saves not just hours, but thousands of dollars. Let’s explore this structured process to turn you into a more effective troubleshooter.
The modern stainless steel tube mill is a complex symphony of mechanical, electrical, and hydraulic systems. When a problem arises, it's rarely isolated. A slight roller misalignment could be a symptom of bearing wear, which itself might stem from inadequate lubrication. This domino effect is why a surface-level fix often fails. A report from the International Journal of Advanced Manufacturing Technology highlighted that over 60% of recurring machine failures1 are due to unresolved root causes. At XZS, we design our machines with diagnostics in mind, integrating sensors and clear PLC feedback. But even the most advanced machine, like our intelligent precision production lines, requires a skilled operator who thinks critically. This guide isn't just a checklist; it's a framework for developing that critical thinking to ensure your production line achieves its promised >98% material utilization and precision tolerances of ≤ ±0.05 mm.
What are the initial steps to diagnose common stainless steel pipe machine issues?
Your production line suddenly stops, and you don't know where to begin looking for the problem. The pressure mounts with every passing minute of inactivity. A wrong first move could waste valuable time or even cause further damage. By following a few clear, initial diagnostic steps, you can safely and systematically narrow down the potential causes.
The initial steps to diagnose stainless steel pipe machine issues are: ensure safety by powering down and locking out the machine, conduct a thorough visual inspection for obvious faults, listen for unusual noises, and check the HMI or PLC for any error messages or alarms.
These initial steps are the bedrock of effective troubleshooting. Skipping them is like a doctor prescribing medicine without asking about symptoms. A client of ours, a large-scale furniture manufacturer in Southeast Asia, once faced intermittent shutdowns on their line. They immediately suspected complex PLC logic errors, a common assumption when faced with a sudden stoppage. For nearly a full shift, their team delved into the electrical schematics, trying to trace a phantom software bug. The actual cause? A simple visual inspection, which they had skipped in their haste, would have revealed a proximity sensor cable on the entry accumulator that had worked its way loose and was chafing against a rotating guard. The intermittent contact was causing the control system to receive faulty signals, triggering a safety stop. This five-minute fix ended up costing them a full day of production and several hundred meters of wasted material. This story is a powerful reminder that mastery lies in perfecting the fundamentals. Before we dive into specific mechanical or electrical faults, it's crucial to understand how to systematically gather these preliminary clues. This foundational knowledge empowers you to approach any problem with confidence, knowing you're building your diagnosis on solid ground rather than guesswork.

The Primacy of Safety: Lockout/Tagout (LOTO) Procedures
Before a single tool is picked up, the absolute first step is to ensure the machine is in a zero-energy state. This isn't just a recommendation; it's a critical safety protocol. The Lockout/Tagout (LOTO) procedure involves completely isolating the machine from all its power sources to prevent any unexpected movement or energization during inspection and repair. I personally witnessed a near-miss early in my career where a maintenance technician narrowly avoided serious injury because a colleague inadvertently restarted a connected conveyor belt. That moment cemented my unshakeable belief that there are no shortcuts when it comes to safety. Adhering to LOTO protects your most valuable asset: your team.
The process is systematic. It begins with shutting down the machine via the standard operating procedure, then isolating all energy sources—this includes the main electrical disconnect, as well as hydraulic and pneumatic lines. Each valve and breaker should be physically locked, and a tag should be applied with the name of the person performing the work. At XZS, our intelligent production lines are designed with clearly marked, centralized energy isolation points and integrated safety interlocks that align with global standards like OSHA 29 CFR 1910.147. This design philosophy simplifies the LOTO process, making it more intuitive and less prone to human error for the operators on the floor.
Ultimately, integrating LOTO into your team's muscle memory transforms it from a procedural chore into a cornerstone of your operational culture. It fosters an environment of mutual respect and safety-consciousness. Leading industry safety reports indicate that adherence to LOTO procedures can reduce workplace injuries during maintenance by over 80%. When your team knows they can work on a machine without fear of accidental startup, they can focus entirely on the diagnostic task at hand, leading to more thorough and effective troubleshooting. It is the non-negotiable first step in any professional maintenance activity.
Sensory Diagnostics: The Art of Observation and Listening
With the machine safely locked out, your senses become your primary diagnostic tools. A thorough visual inspection is the most powerful and underrated technique in troubleshooting. Walk the entire length of the production line, from the uncoiler to the cut-off saw. Look for the obvious and the subtle: hydraulic fluid pooling under a fitting, metal shavings collecting around a roller stand, a loose bolt on a guard rail, or a cracked weld on the machine's frame. These are all direct clues that point to a specific problem area. A small, consistent drip of oil might seem minor, but it could indicate a failing seal that will eventually lead to a catastrophic hydraulic pressure loss.
Sound provides another layer of critical information. Before initiating LOTO, if it's safe to do so, listen to the machine while it's running (or attempting to run). You and your operators should be intimately familiar with the normal operational hum of the line. Any deviation—a high-pitched squeal from the forming section, a rhythmic knocking from a gearbox, a grinding sound as the weld box passes—is a clear signal of distress. I once helped an automotive exhaust producer in Brazil diagnose an issue over the phone. They described a "whining sound" that got progressively louder with line speed. Based on their description, we focused on the high-speed rotating elements. It turned out to be a failing bearing in one of the main drive gearboxes, which they caught weeks before it could have seized and destroyed the entire transmission, saving them an estimated $50,000 in emergency repairs and lost production.
Beyond sight and sound, don't neglect other senses. The distinct smell of an overheating electric motor or burning wire insulation can immediately point you to an electrical fault. The feeling of excessive vibration in a particular section of the machine's frame can help you pinpoint an imbalance or a severe mechanical issue. These sensory inputs are raw, real-time data. A skilled troubleshooter collects all of these clues before consulting a manual or looking at a screen. It’s a holistic approach that builds a complete picture of the machine's state, often revealing the root cause much faster than focusing on a single, isolated symptom.
Leveraging Onboard Intelligence: Reading the PLC/HMI
After performing your sensory checks, the next step is to consult the machine's brain: the Programmable Logic Controller (PLC)2 and its Human-Machine Interface (HMI). Our XZS production lines are equipped with a fully automated PLC and a large, intuitive touch-screen HMI that serves as the central nervous system of the operation. This system doesn't just run the machine; it constantly monitors its health, providing a wealth of diagnostic information that is invaluable for quick troubleshooting. The HMI is your first port of call for any fault that isn't immediately obvious from a visual inspection.
It's crucial to go beyond simply reading an error code; you must learn to interpret what it implies. For instance, an HMI alarm that reads "Forming Motor Overload" doesn't automatically mean the motor has failed. While that's a possibility, the root cause is more likely to be external. It could be a mechanical jam in the roller stands, a failing bearing that's increasing the rotational load, or even an incorrect roller setup that's putting excessive strain on the system. The error code is a symptom, and your job is to use it as a starting point to investigate the underlying disease. A systematic approach would be to check the mechanical systems first before assuming an electrical failure.
Modern HMIs, like those on our machines, also provide access to historical alarm logs and data trends. This feature is a powerful tool for moving from reactive to predictive problem-solving. If the "Motor Overload" error has occurred three times in the last month, always on a Monday morning, it might point to an issue with machine warm-up procedures rather than a random fault. By analyzing these patterns, you can identify recurring problems and address their root causes. This data-driven approach, combining operator observation with the PLC's intelligence, is the fastest and most effective way to diagnose complex issues and maintain the high uptime and precision your customers demand.
| Error Code | HMI Message | Possible Cause(s) | Initial Action |
|---|---|---|---|
MOT_OVL_01 |
Forming Motor Overload | Mechanical jam, bearing failure, incorrect roller setup | Perform LOTO, inspect forming section for obstructions |
WLD_CUR_FLT |
Welding Current Fault | Worn electrode, poor ground connection, coolant issue | Check weld head components and coolant flow |
HYD_PRS_LOW |
Hydraulic Pressure Low | Pump failure, fluid leak, clogged filter | Inspect hydraulic lines, check fluid level and filter |
ENC_SIG_ERR |
Encoder Signal Error | Loose cable, encoder failure, electrical noise | Check encoder connections and shielding |
LOTO prevents accidental startupsTrue
Lockout/Tagout procedures physically isolate energy sources to ensure machines cannot be restarted during maintenance.
Error codes always indicate root causesFalse
PLC error messages show symptoms - the actual problem may be mechanical (e.g., jammed rollers causing motor overload).
How can you identify specific problems affecting machine performance?
Your pipes are coming out with defects like bad welds or incorrect dimensions, but you're not sure which part of the machine is failing. Producing scrap material wastes time and money, damaging your reputation for quality. By learning to correlate specific pipe defects with machine sections—forming, welding, sizing—you can pinpoint the root cause quickly.
To identify specific problems, analyze the pipe's defects. An inconsistent weld seam points to the welding unit, dimensional inaccuracies suggest forming or sizing roller issues, and surface scratches often originate from misaligned guides or rollers throughout the production line. Correlating the defect to a machine zone is key.
Moving from a general "something is wrong" to a specific "the issue is in the sizing section" is the most significant leap in troubleshooting. It focuses your efforts and resources efficiently, preventing you from wasting time on the wrong part of a long production line3. I remember working with a building-material wholesaler in the United States who was struggling with persistent ovality in their 3-inch pipes. Their team spent two full days tweaking the parameters on their high-frequency welder, convinced it was an issue of insufficient heat or improper weld pressure. Their logic was that the weld was the weakest point, so it must be the source of the deformation. However, a systematic analysis revealed the problem was actually worn-out rollers in the final two sizing stands. The pipe was perfectly round after welding, but the worn tooling was squeezing it out of shape at the very end of the process. This experience highlights a critical truth: the symptom (a bad pipe) often appears far downstream from the actual cause. Understanding how to trace that symptom backward through the production process—by carefully inspecting the product at each stage—is an invaluable skill. This involves a deeper dive into the common culprits affecting weld quality, dimensional accuracy, and surface finish, and learning the unique signature of each problem.

Deconstructing Weld Seam Imperfections
The weld seam is the heart of the pipe; its integrity defines the product's quality and strength. When defects appear here, they typically fall into a few categories: incomplete fusion (a weak or open seam), pinholes (porosity), or an asymmetrical or misaligned weld bead. Each of these points to a different set of potential problems concentrated around the welding process4 and fin pass sections of your mill. An open seam, for example, is often a straightforward issue of insufficient welding power or the edges of the strip being too far apart as they enter the weld box. A simple adjustment to the power level or the fin pass rollers can often resolve this.
However, more subtle issues require deeper investigation. Porosity and pinholes can be particularly frustrating. They can be caused by impurities on the steel strip, but they are also frequently linked to the high-frequency welding process itself. A client of ours, an HVAC contractor producing pipes for large commercial projects, reported intermittent "stitching" in their weld seam—small, periodic gaps that compromised pressure ratings. We guided them to analyze the data from their XZS line's energy-saving high-frequency welder. The system logs showed minor but sharp fluctuations in the welder's output impedance. The root cause wasn't the welder's power components, but an inconsistent flow of coolant to the induction coil. This caused the coil to overheat slightly, altering its electrical properties and creating the defect. A simple adjustment to their coolant pump and a filter cleaning solved the problem permanently.
This case highlights that analyzing weld quality requires a holistic view of the welding system. This includes the state of the impeder, the alignment and condition of the induction coil, the consistency of the coolant flow, and the stability of the power supply. According to a study by the American Welding Society, over 40% of high-frequency induction welding defects are related to improper setup or poor maintenance of the coil and impeder. Our machines are designed for stable, efficient welding, but achieving that promised 98% material utilization rate requires that operators understand how to maintain these critical components. Regular inspection and cleaning are not just best practices; they are essential for quality production.
Diagnosing Dimensional and Shape Inaccuracies
Achieving precise dimensional tolerance is the primary function of a tube mill. When your machine promises a precision of ≤ ±0.05 mm, as our XZS lines do, any deviation is a critical issue that must be addressed immediately. The most common dimensional problems are incorrect outside diameter (OD), ovality (out-of-roundness), and a lack of straightness (camber or bow). These issues almost exclusively originate from the setup, alignment, or condition of the roller tooling in the breakdown, fin pass, and sizing sections. A common mistake I see operators make is treating each roller stand as an independent variable. They might overtighten one stand to correct a high spot, without realizing that this simply transfers stress and creates a new problem in the next stand.
The diagnosis of dimensional flaws must be a linear, methodical process. The key is to isolate exactly where in the line the deviation begins. This requires using precision measurement tools like digital calipers, micrometers, and pi-tapes to measure the tube profile at accessible points between sections. For example, if you are producing a 50mm round tube, check its diameter and roundness after the fin pass section (before welding) and then again after the final sizing stand. If the tube is perfectly formed and on-size before the weld but comes out with an incorrect diameter or ovality from the sizing section, you have successfully localized the problem to the sizing stands. This immediately rules out any issues in the entire forming section.
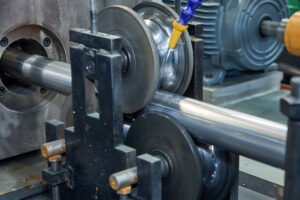
Once localized, the investigation can focus on the specific rollers. Is there excessive or uneven wear? Are the bearings for that stand worn, causing the shaft to wobble? Is the vertical and horizontal alignment correct? A client producing high-spec automotive components found that a recurring ovality issue was caused by a worn keyway on a single roller shaft in the sizing section. The slight play was enough to throw the pipe out of tolerance, but it was almost impossible to see with the naked eye. They discovered it by systematically checking the runout of each roller shaft with a dial indicator. This meticulous, data-driven approach is essential. Our quick-change tooling systems are designed for rapid and precise setup, but this precision can only be maintained if the underlying shafts, bearings, and alignment are periodically verified.
Tracing the Origin of Surface Finish Defects
For many applications, especially decorative tubing for furniture, sanitary-ware, or architectural elements, the surface finish of the pipe is just as important as its dimensional accuracy. Common surface defects include scratches, scuff marks, gouges, and repetitive roll marks. These flaws can render a finished product unusable, leading to costly scrap. The key to diagnosing surface defects is to understand that they are a "fingerprint" left by a problem component. Your job is to become a detective and trace that fingerprint back to its source. The pattern and location of the mark are your primary clues.
The investigation starts by carefully examining the defect. A long, continuous scratch running perfectly parallel to the weld seam is almost certainly caused by a sharp edge or a metal burr on a stationary component, such as an entry guide, a weld bead trimmer (scarfing tool), or a guide in the sizing section. In contrast, a mark that repeats at a regular interval is the signature of a damaged rotating component. By measuring the distance between the repeating marks, you can often calculate the circumference of the offending roller and pinpoint its exact location. For example, if a mark repeats every 314 mm on the pipe, you are looking for a roller with a diameter of approximately 100 mm (since Circumference = π * Diameter).
I recall a case with a customer who produces high-polish decorative tubes for export to the European market. They were facing contract rejection due to very fine, almost invisible spiral scratches on their pipes. A straight scratch is easy to trace, but a spiral one is trickier. By treating the pipe like a crime scene, their quality manager carefully marked the start and end of one full rotation of the spiral scratch. By measuring the linear distance of this pitch, they were able to match it to the rotational speed and angle of the rollers in their Turks head straightening unit. A close inspection revealed that a tiny piece of hardened metal swarf had become embedded in one of the straightening rollers, acting like a lathe tool and cutting a fine groove into every pipe that passed. This meticulous, forensic-style analysis prevented a massive financial loss. It's also why many of our clients invest in our automatic tube polishing machines as a final quality assurance step, but finding and fixing the source of the scratch in the mill is always the most efficient solution.
Weld defects indicate welding unit issuesTrue
Inconsistent weld seams, pinholes, or misaligned beads typically point to problems in the welding section, such as power fluctuations or coolant flow issues.
Dimensional errors always originate in formingFalse
Dimensional inaccuracies can occur at any stage, including sizing sections where worn rollers or misalignment often cause ovality or diameter issues.
What tools and techniques are essential for resolving common machine issues?
You've identified a potential issue, but now you need to confirm and fix it. Using the wrong tool or technique can be ineffective or even cause more damage. Guesswork leads to extended downtime and repeated failures. Having the right set of tools and applying proven techniques is essential for a fast, accurate, and lasting repair.
Essential tools for resolving machine issues include precision measurement instruments like calipers and micrometers, standard mechanical hand tools, and diagnostic aids like temperature guns and vibration analyzers. Key techniques involve systematic component isolation and data-driven adjustments based on precise measurements.
The difference between a novice and an expert troubleshooter often comes down to their toolkit—and not just the physical one. The expert's toolkit also includes a deep understanding of how and when to use each tool. For an industrial equipment distributor we work with in the Middle East, we helped their field service team develop a standardized troubleshooting kit and methodology. Previously, their engineers would arrive at a customer site with a generic set of wrenches and a multimeter. After our training, their standard kit included calibrated calipers, a laser alignment tool, and an infrared thermometer. This allowed them to move beyond guesswork and start collecting hard data. They could prove a roller was misaligned, show a motor was overheating, or confirm a pipe was out of spec. This data-driven approach not only helped them fix problems faster but also enhanced their credibility and professionalism in the eyes of their customers. This is the approach we'll explore now: equipping you with the right physical and intellectual tools for the job.

Essential Hand and Power Tools for Mechanical Adjustments
The foundation of any troubleshooting toolkit is a comprehensive set of high-quality hand tools. These are the instruments you'll use for the vast majority of mechanical adjustments, from aligning a roller stand to tightening a loose fitting. A basic set should include a full range of metric and imperial wrenches and socket sets, as a single machine can often have components from different international standards. Allen keys (hex wrenches), torque wrenches, adjustable spanners, and a variety of screwdrivers are also non-negotiable. Investing in professional-grade tools is critical; a cheap wrench that slips and rounds off a bolt head can turn a ten-minute job into a two-hour ordeal involving drills and extractors.
Beyond the basics, specialized tools are often required. For instance, bearing pullers and presses5 are essential for safely removing and installing bearings without damaging the shaft or housing. A set of feeler gauges is indispensable for setting the precise gaps required in roller tooling and scarfing tool setups. I once visited a client who was struggling with inconsistent scarfing of the inner weld bead. Their operators were using folded paper as a makeshift feeler gauge. By introducing them to a proper set of feeler gauges and demonstrating the correct technique, we were able to standardize their setup process, immediately improving the internal finish of their pipes and reducing downstream cleaning requirements.
Power tools can significantly speed up repairs, but they must be used with care. Cordless impact wrenches are excellent for disassembly but should be used with extreme caution during assembly to avoid over-torquing and damaging threads. A portable grinder might be needed to remove a burr or prepare a surface, but it requires a steady hand and proper personal protective equipment (PPE). The goal of using these tools is to implement a precise fix. The robust, CNC-machined frames of our XZS machines are built for long-term durability, but their precision relies on components being correctly assembled and tightened to specification. A torque wrench isn't a luxury; it's a necessity for ensuring the machine's integrity.
Precision Measurement Instruments for Quality Control
While hand tools allow you to make adjustments, precision measurement instruments tell you what to adjust and if your adjustment was successful. Troubleshooting without measurement is simply guessing. The most fundamental of these is the digital caliper. It should be used constantly to check the outside diameter, inside diameter (after scarfing), and wall thickness of the pipe as it is produced. A high-quality caliper with a resolution of at least 0.01 mm is the bare minimum for professional tube production, especially when aiming for tolerances of ±0.05 mm. Regular calibration of these instruments against a known standard is also crucial to ensure their accuracy.
For even higher precision and for diagnosing issues like ovality and taper, a micrometer is the superior tool. While a caliper is fast, a micrometer provides more accurate and repeatable readings, making it ideal for final quality control checks and for calibrating the on-line measurement systems. Another vital tool, particularly for larger diameter pipes, is a pi-tape6. Pi-tapes are specially designed to measure the circumference of a round object and provide a direct reading of its average diameter, which can be more accurate than a two-point caliper measurement for identifying overall size issues. A client producing large diameter pipes for oil and gas applications used pi-tape measurements to settle a dispute with a steel supplier, proving the material they received was out of spec for thickness, which was the true root cause of their forming problems.
Beyond dimensional tools, other instruments are key for diagnosing system health. An infrared thermometer, or temperature gun, is a safe and effective way to check the temperature of motors, bearings, gearboxes, and electrical cabinets from a distance. A bearing that's running 30°C hotter than the others is a clear sign of impending failure. Similarly, a simple laser pointer or a more sophisticated laser alignment tool can be used to quickly check the alignment of roller stands over the length of the mill. This is far faster and more accurate than using string lines, allowing for rapid verification of the machine's core geometry, which is the foundation of producing straight, consistent pipe.
Advanced Diagnostic Technologies
For maintenance teams looking to elevate their troubleshooting capabilities from reactive to predictive, investing in advanced diagnostic technologies is the next logical step. These tools allow you to "see" inside the machine while it's operating, detecting problems long before they become critical failures. One of the most powerful technologies is vibration analysis7. Every rotating component in a tube mill—motors, gearboxes, shafts, and bearings—has a unique vibration signature when it's healthy. As a component begins to wear out, this signature changes in predictable ways. A trained analyst using a portable vibration sensor can detect the subtle signs of bearing fatigue, gear tooth wear, or shaft misalignment weeks or even months before the component fails, allowing for a planned replacement during scheduled downtime.
Another incredibly useful technology is thermal imaging, or thermography. While an infrared thermometer gives you a temperature reading at a single point, a thermal imaging camera creates a complete heat map of your equipment. This can instantly reveal issues that would be otherwise invisible. For example, a thermal image of an electrical control panel can show a loose connection or a failing circuit breaker as a distinct hot spot. On the mechanical side, it can highlight poor lubrication in a bearing, uneven heating in the welding zone, or inefficient cooling systems. We once used a thermal camera to help a customer identify a blocked coolant passage within their weld induction coil, a problem that was impossible to see visually but was immediately obvious on the heat map.
While these tools represent a significant investment, their return on investment (ROI) is often realized quickly through the prevention of a single major unplanned shutdown. A study by the U.S. Department of Energy found that a properly implemented predictive maintenance program can provide a tenfold ROI. Integrating these advanced diagnostics with the robust PLC systems on our XZS machines creates a powerful synergy. The PLC can flag an "overcurrent" alarm, and the maintenance team can use a thermal camera and vibration analyzer to determine if the cause is a failing motor bearing or a mechanical jam, leading to a precise, efficient repair. This is the future of smart manufacturing: combining onboard intelligence with advanced external diagnostics to achieve near-zero unplanned downtime.
Precision tools prevent guessworkTrue
Using calibrated measurement tools like calipers and micrometers provides objective data for accurate troubleshooting, eliminating reliance on estimation.
Cheap tools save timeFalse
Low-quality tools often cause additional damage (e.g., rounded bolts) that requires more time to repair than using professional-grade tools initially.
How can regular maintenance prevent future problems and enhance uptime?
You're skilled at fixing problems, but you seem to be fighting the same fires over and over. This reactive cycle is stressful, inefficient, and costly. Constantly fixing breakdowns means you're not optimizing production or improving quality8. By shifting from a reactive "fix-it" mindset to a proactive, preventative maintenance culture, you can eliminate most common failures before they ever occur, unlocking new levels of productivity and reliability.
Regular maintenance prevents future problems by systematically addressing wear and tear before it leads to failure. A proactive schedule of inspection, lubrication, cleaning, and calibration keeps the machine operating within its optimal parameters, directly enhancing uptime and ensuring consistent product quality.
The concept is simple: it's far cheaper and faster to change the oil in your car than to replace a seized engine. The same principle applies, on a much larger scale, to a stainless steel pipe machine. One of our most successful clients, a major automotive exhaust manufacturer in Brazil, attributes their 99% uptime record directly to their rigorous preventive maintenance (PM) program. When we first installed their heavy-duty tube mill, they were focused solely on production targets. After two unexpected breakdowns in the first year, we worked with them to develop a detailed PM schedule based on our recommendations. They dedicated one shift every two weeks specifically to maintenance tasks. Within six months, their emergency repair calls dropped to zero, and their material utilization increased because they were producing less scrap. They stopped being firefighters and became pilots, expertly guiding their machine to peak performance. This is the transformation that a true maintenance culture can bring.

Developing a Proactive Maintenance Schedule (Daily, Weekly, Monthly)
The cornerstone of any effective PM program is a structured, multi-layered schedule. This isn't a generic checklist but a detailed plan tailored to your specific machine, production volume, and operating environment. This schedule should be broken down into daily, weekly, monthly, and annual tasks, with clear responsibilities assigned to operators and maintenance staff. A tiered approach ensures that critical tasks are performed frequently without overburdening the team. Daily checks are typically performed by the operators themselves. These are quick, five-minute inspections at the start of a shift: checking fluid levels (hydraulic, coolant), visually inspecting for leaks or loose parts, and ensuring all safety guards are in place. This empowers operators to take ownership of their equipment and catch small issues immediately.
Weekly tasks are more involved and might be performed by a lead operator or a maintenance technician. This could include cleaning rollers and guides to prevent material buildup, checking the tension and condition of drive belts and chains, and verifying the accuracy of the scarfing tool. This is also a good time to review the PLC alarm history from the past week to spot any recurring, low-level faults that might indicate a developing problem. This systematic review transforms the PLC from a simple alarm system into a predictive tool.
Monthly and annual tasks are the deep dives, often requiring partial disassembly and planned downtime. These include tasks like changing hydraulic fluid and filters, using a dial indicator to check shaft runout on key roller stands, verifying electrical connections are tight in the main cabinet, and performing a full calibration of the roller tooling using master gauges. According to data from the Reliability Analysis Center, industrial facilities that implement a comprehensive scheduled maintenance program see an average reduction of 70% in unplanned downtime. This structured approach is the engine of reliability, turning maintenance from a cost center into a profit driver.
The Critical Role of Lubrication and Hydraulic System Care
Within the maintenance schedule, two areas deserve special attention due to their outsized impact on machine health: lubrication and hydraulic system care. Proper lubrication is the lifeblood of any mechanical system. A shocking number of premature bearing, gear, and slide-way failures can be traced back to a single cause: inadequate or incorrect lubrication. Your PM program must have a detailed lubrication plan, often called a "lube map." This map should specify every lubrication point on the machine, the type of lubricant to be used (e.g., ISO VG 220 gear oil, NLGI #2 grease), the quantity to apply, and the frequency of application. Using the wrong grease can be just as bad as using no grease at all, as different formulations are designed for specific speeds, loads, and temperatures.
The hydraulic system is the muscle of the machine, powering key functions like the uncoiler, accumulator, and cut-off press. Its health is entirely dependent on the condition of the hydraulic fluid. Contaminated fluid acts like liquid sandpaper, accelerating wear on expensive pumps, valves, and cylinders. Therefore, a religious adherence to the filter change schedule is non-negotiable. Oil analysis is a highly recommended practice for any large-scale operation. For a small fee, a lab can analyze a sample of your hydraulic fluid and provide a detailed report on its condition, including the presence of wear metals (like copper from pumps or iron from cylinders) and other contaminants.
I once helped a client who was replacing their $5,000 hydraulic cut-off pump almost every six months. They were changing the filters, but they weren't cleaning the reservoir. We drained the tank and found a thick layer of sludge at the bottom that was being constantly churned up and circulated through their brand-new pumps. After implementing a biannual reservoir flush and clean as part of their PM schedule, their pump life more than quadrupled. This illustrates that hydraulic maintenance is more than just topping off the fluid; it's about maintaining the cleanliness and integrity of the entire system.
Roller Tooling Management: The Key to Long-Term Precision
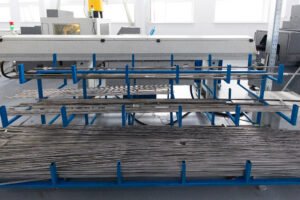
For a tube mill, the roller tooling is where the magic happens. The condition of these rollers directly determines the quality and precision of the final product. Even the most robust, heavy-duty tube mill frame is useless if the tooling that shapes the metal is worn or damaged. Therefore, a dedicated roller tooling management program is not just a part of your maintenance strategy—it is central to it. This program goes beyond simply replacing a broken roller; it involves a full lifecycle management approach. When not in use, rollers should be cleaned, inspected for wear or damage, coated with a rust preventative, and stored in labeled, organized racks, not piled in a corner.
Regular inspection is critical. This involves not just a visual check for chips or cracks but also a quantitative measurement of the roller's profile using a profile gauge or shadowgraph. This allows you to track wear over time and predict when a roller will go out of tolerance, allowing you to regrind or replace it before it starts producing scrap pipe. A well-organized "tool room" is the heart of this program. Each set of rollers should have a logbook that tracks its usage hours, the tonnage of material produced, and its maintenance history (e.g., "Reground on [Date]"). This data is invaluable for cost analysis and inventory management.
Furthermore, this proactive approach to tooling management enables better production planning. If you know that a particular roller set for a popular pipe size is nearing the end of its life, you can schedule its replacement to coincide with other maintenance tasks, minimizing total downtime. Our quick-change tooling systems are designed to reduce swap-over times to a minimum, but this advantage is maximized when you have a well-maintained, ready-to-go set of rollers waiting. A report in Tube & Pipe Journal indicated that mills with a formal tooling management program report up to a 15% higher yield due to reduced setup scrap and dimensional defects. This is a clear demonstration that managing your tooling is a direct investment in your product quality and bottom line.
Preventive maintenance reduces unplanned downtimeTrue
The article states that facilities with scheduled maintenance programs see 70% less unplanned downtime, as demonstrated by the Brazilian automotive manufacturer's 99% uptime record.
Operators should never perform maintenance tasksFalse
The text specifically mentions that daily checks (like fluid inspections) are performed by operators, empowering them to catch small issues immediately.
What are the best practices for documenting and reviewing machine troubleshooting results?
You fixed the machine, but a few months later the same problem happens and nobody remembers the solution. This institutional amnesia is a common and costly problem. Crucial knowledge walks out the door with experienced employees. By implementing a systematic process for documenting and reviewing every troubleshooting event, you can build a powerful, in-house knowledge base that accelerates future repairs and drives continuous improvement.
Best practices for documenting troubleshooting results include using a standardized troubleshooting log for every incident, capturing details of the symptoms, root cause, and solution, and conducting regular reviews of these logs to identify recurring trends and opportunities for permanent fixes.
The goal is to stop solving the same problems and start engineering them out of existence. This requires a shift in perspective: every breakdown is not a failure, but a learning opportunity. One of our clients, an EPC contractor in India, was facing recurring issues across multiple production sites. They implemented a simple, cloud-based troubleshooting log that every maintenance team was required to fill out after a repair. During their quarterly review, they noticed that 30% of their electrical faults across all sites were related to a specific brand of proximity sensor failing in high-vibration areas. Armed with this data, they were able to justify a switch to a more robust sensor model, a permanent solution that eliminated a whole category of problems and significantly improved the reliability of their operations. This is the power of good documentation.

Creating a Standardized Troubleshooting Log
The foundation of a good documentation system is a standardized troubleshooting log. Consistency is key; if everyone is recording information differently, it's impossible to analyze it effectively. Whether it's a digital spreadsheet, a dedicated software application, or even a paper-based logbook, the format should be consistent and mandatory for every repair event. The log should be designed to be quick to fill out yet comprehensive enough to be useful later. At a minimum, each entry should capture essential data points that tell the complete story of the failure.
The first section should cover the "Problem." This includes the date and time of the failure, the machine ID, the operator who reported it, and a detailed description of the symptoms. Encourage operators to be specific. Instead of "machine stopped," they should write "machine stopped with 'Weld Current Fault' on HMI, accompanied by a sizzling sound from the weld box." The second section is the "Diagnosis." This part should detail the steps taken to find the problem, such as "Performed LOTO. Visually inspected weld box. Found worn-out contact tips on the welder." This documents the thought process and the diagnostic trail.
Finally, the most important section is the "Resolution." This must include the corrective actions taken ("Replaced contact tips with Part #XYZ-123"), the time it took to repair, and the name of the technician who performed the work. An optional but highly valuable field is "Parts Used," which helps with inventory management. Creating this simple, standardized log transforms anecdotal knowledge into structured data. It becomes the raw material for building a powerful, searchable database of every problem your machine has ever had and, more importantly, how it was solved. This is the first step in building a true learning organization.
The Power of the Post-Mortem: Analyzing Failures to Prevent Recurrence
Documenting a failure is only half the battle. The real value is unlocked when you regularly review this data to learn from it. This is the "post-mortem" or root cause analysis9 (RCA) process. While a full RCA might not be necessary for every minor fix, it should be standard practice for any significant or recurring failure. The goal of the post-mortem is to move beyond the immediate technical cause (the "what") and uncover the underlying organizational or systemic cause (the "why"). For example, the technical cause of a failure might be a burnt-out motor. A post-mortem asks why the motor burned out. Was it due to a lack of lubrication? Why wasn't it lubricated? Because it wasn't on the PM schedule. Why not? Because the schedule was never updated after the motor was installed. This "Five Whys" technique helps you trace the problem back to a fixable process issue.
These review meetings should be blameless. The purpose is not to point fingers but to improve the system. Involve the operator who first reported the issue and the technician who fixed it. Their firsthand experience is invaluable. The output of a post-mortem shouldn't be a report that sits on a shelf; it should be a concrete action plan. For the burnt-out motor example, the actions might be: 1) Add the motor to the PM lubrication schedule. 2) Assign responsibility for updating PM schedules after any new equipment installation. 3) Review all PM schedules for completeness.
A large building-material wholesaler we work with has a "Failure of the Week" meeting every Friday. They pick the most significant downtime event from their logs and conduct a 30-minute post-mortem. This simple, consistent habit has had a profound impact. It has led to dozens of small process improvements—better-written procedures, improved operator training, and smarter PM tasks—that have cumulatively doubled the mean time between failures (MTBF) on their main production lines. They are no longer just fixing problems; they are systematically eliminating them.
Building a Knowledge Base for Continuous Improvement
The ultimate goal of documentation and review is to create a living, evolving knowledge base10. This is your company's unique encyclopedia of machine reliability. A well-organized collection of troubleshooting logs, post-mortem reports, and updated procedures becomes the single source of truth for your maintenance and operations teams. When a new technician joins the team, they can study this knowledge base to get up to speed far more quickly than through trial and error. When a rare or unusual fault occurs, a quick search of the database might reveal that the exact same issue happened three years ago, providing the solution instantly and saving hours of diagnostic time.
This knowledge base also provides the hard data needed to justify investments and drive strategic decisions. When you can present management with a report showing that "Bearing set #ABC-456 has failed six times in the last year, costing 40 hours of downtime and $12,000 in lost production," it becomes much easier to get approval to test a higher-quality, more expensive bearing. This data-driven approach removes emotion and opinion from decision-making and replaces it with facts. It allows you to focus your resources on the "vital few" problems that are causing the most pain.
At XZS, we provide comprehensive technical manuals and offer training through webinars and on-site support. However, the most effective knowledge base is the one you build yourself, based on the unique conditions and challenges of your own factory floor. By diligently documenting every issue, analyzing your failures, and sharing that knowledge, you create a cycle of continuous improvement. Your team gets smarter, your machine gets more reliable, and your business becomes more resilient and profitable. It’s a long-term investment in operational excellence that always pays dividends.
Standardized logs improve troubleshootingTrue
Consistent documentation formats enable effective analysis of recurring issues and solutions.
Post-mortems should assign blameFalse
Effective root cause analysis focuses on systemic improvements rather than individual blame.
Conclusion
Maximizing uptime is not about being a heroic firefighter. It's about being a disciplined architect—building robust systems for diagnosis, maintenance, and documentation. This proactive approach transforms your stainless steel pipe machine from a source of problems into a reliable engine for profit and growth.
-
Discover the top reasons for recurring machine problems and how to address them. ↩
-
Explore how PLC systems enhance diagnostic accuracy in industrial troubleshooting. ↩
-
Discover methods to troubleshoot production line issues efficiently without wasting resources ↩
-
Explore common high-frequency welding problems and solutions to maintain quality weld seams ↩
-
Discover tools essential for bearing maintenance without damaging equipment. ↩
-
Understand the role of pi-tapes in precise diameter measurement and quality disputes. ↩
-
Explore how vibration analysis predicts component wear and prevents failures. ↩
-
Learn the benefits of proactive maintenance in boosting output and reducing costs. ↩
-
Understand the 'Five Whys' technique in post-mortem analysis for preventing problem recurrence. ↩
-
Discover how documentation creates a reliable database for enhancing operational efficiency. ↩