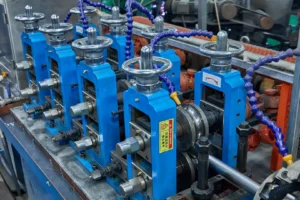
Automatic Stainless Steel Pipe TIG Orbital Welder
Manual TIG welding is slow and inconsistent. This leads to costly defects and production delays, especially for high-stakes projects. Our automatic TIG orbital welders[^1] deliver perfect, repeatable welds every time.
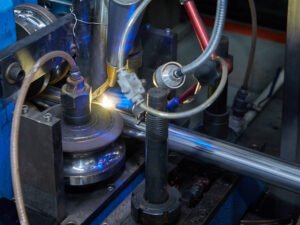
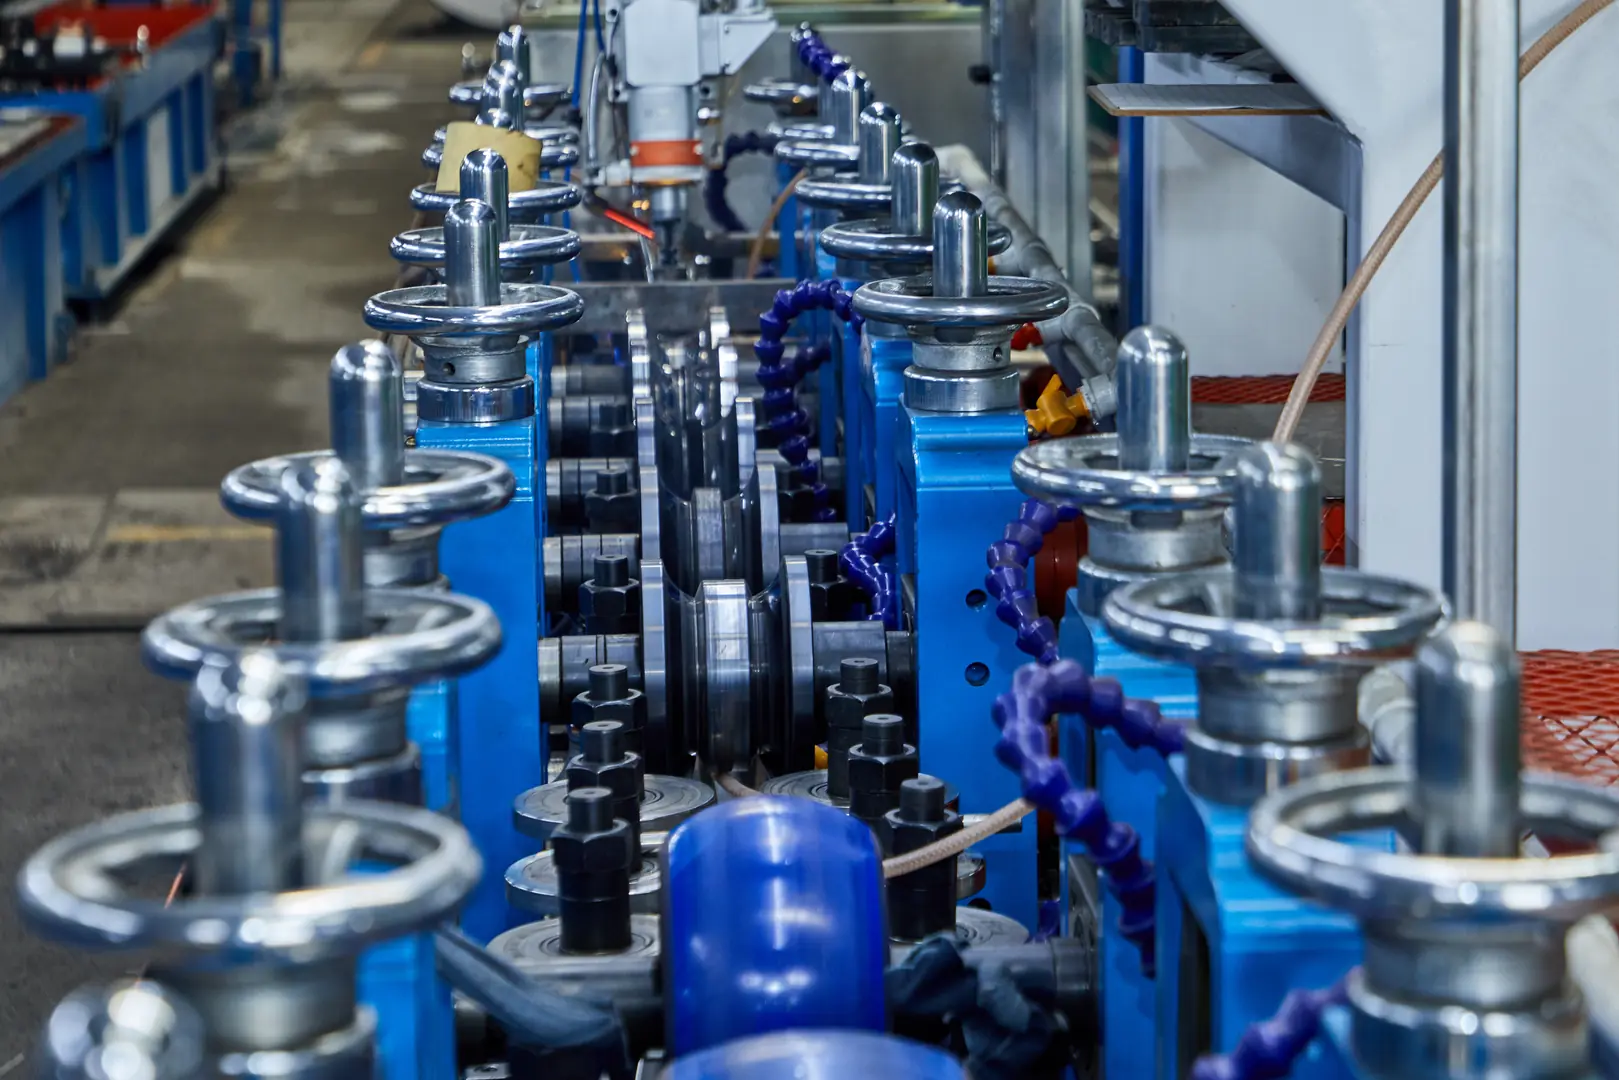
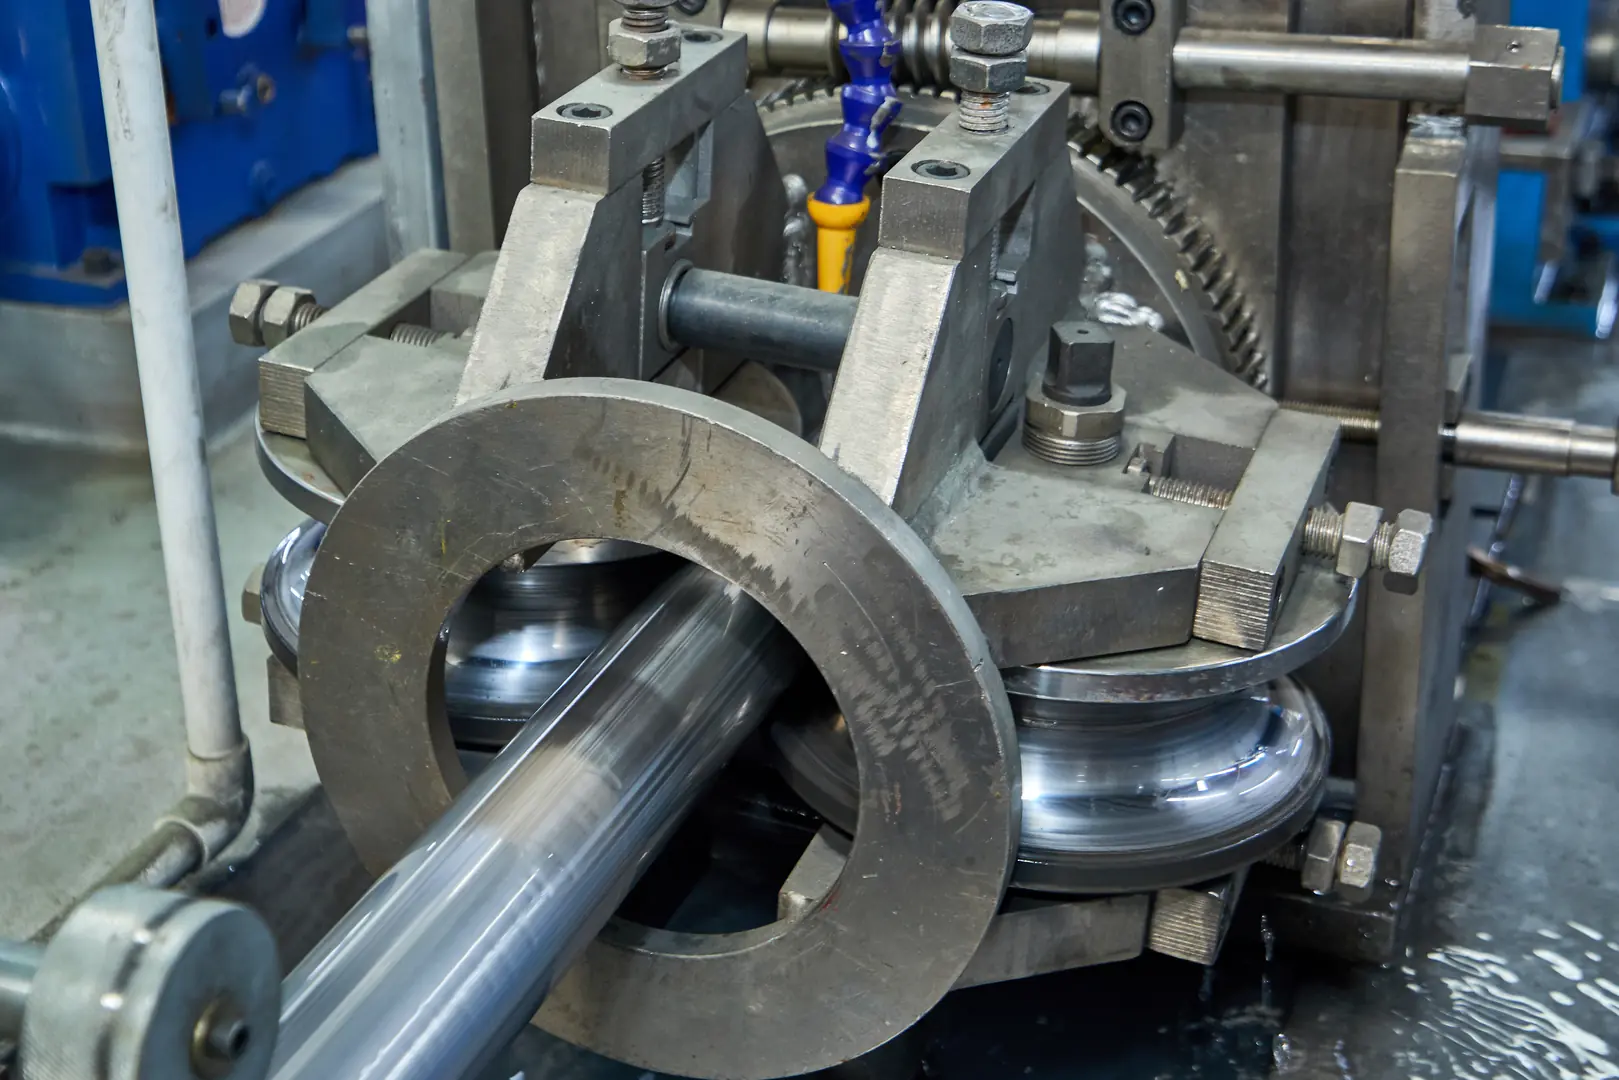
An Automatic Stainless Steel Pipe TIG Orbital Welder works by clamping a specialized weld head onto the pipe. This head then rotates, or "orbits," 360° around the joint, using a computer-controlled TIG process to create a flawless, highly repeatable, and uniform weld seam without manual intervention.
In my 15+ years of experience, I've seen technology transform our industry. The shift from manual to automated orbital welding is one of the biggest leaps forward. It's a game-changer for sectors like aerospace and automotive, where precision is not just a goal—it's a requirement. We've seen clients boost their weld quality by up to 50% compared to manual methods, drastically cutting down on rework. This machine isn't just about welding; it's about achieving a new level of operational excellence. Let's walk through the five key stages of how it works.
How Do You Set Up an Automatic Stainless Steel Pipe TIG Orbital Welder?
A bad setup can ruin an entire production run. One wrong parameter means wasted material and compromised product integrity. Following a clear setup process guarantees perfect welds from the start.
To set up an automatic TIG orbital welder, you must select the correct weld head and collets for your pipe diameter, securely mount the unit, connect the power and argon shielding gas, and program the initial welding parameters into the PLC control system.
The Foundation of a Perfect Weld
Proper setup is where precision begins. It’s a methodical process that our machines are designed to simplify, but every step is critical. First, you must physically configure the machine for the job at hand. This means choosing the right components.
1. Selecting the Right Components
The weld head is the heart of the operation. You need to choose a head size that matches your pipe's outer diameter. At XZS, we provide a range of quick-change heads and collets (the clamps that hold the pipe) to accommodate various sizes, ensuring a secure and perfectly centered fit. A poor fit leads to an inconsistent arc distance and a flawed weld.
2. Power and Gas Connection
Next, connect the power supply and the shielding gas. We exclusively use argon for TIG welding stainless steel because it creates an inert atmosphere that protects the weld pool from oxygen. Ensure your connections are tight and your gas flow rate is correct. This prevents contamination and ensures a clean, strong weld.
3. Initial Parameter Input
Finally, you program the weld schedule using the touch-screen interface. Here, you tell the machine everything it needs to know: the pipe material (e.g., 304 or 316 stainless steel), wall thickness, and target travel speed. Our systems come with pre-loaded settings, but they are fully customizable to meet the exact needs of your project.
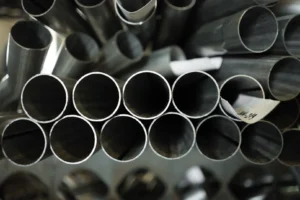
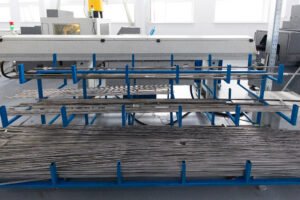
What Is the Best Way to Prepare a Stainless Steel Pipe for Welding?
Dirty or poorly cut pipe ends will contaminate your weld. This contamination creates porosity and weak joints that fail inspections. A meticulous preparation process guarantees a strong, clean, and durable weld.
The best way to prepare a stainless steel pipe is to cut the ends perfectly square, deburr them thoroughly, and clean the joint area with a solvent like acetone on a lint-free cloth to remove all oils, grease, and surface contaminants.
Cleanliness is Non-Negotiable
I cannot overstate this: the quality of your weld is directly tied to the quality of your preparation. You can have the best machine in the world, but if the material isn't properly prepared, the result will be substandard. This is a principle we live by at our XZS factory.
1. Achieving a Square Cut
The pipe ends must be perfectly flush to ensure a consistent gap for the weld. We recommend using a dedicated orbital pipe saw or a facing tool. This creates a clean, 90-degree surface, which is essential for a good fit-up and uniform weld penetration. An angled cut will result in an uneven weld bead.
2. The Deburring Process
After cutting, small metal shavings, or burrs, will be present on the inner and outer edges of the pipe. These must be removed with a deburring tool[^2]. If left behind, burrs can fall into the weld pool, creating inclusions that weaken the joint.
3. Cleaning and Degreasing
This is the final and most critical preparation step. Use a clean, lint-free cloth and a non-residue solvent like acetone to wipe the inside and outside of the pipe ends (about 2 inches back from the edge). This removes any machining oils, fingerprints, or dirt. A crucial tip from my experience: never use a carbon steel wire brush on stainless steel, as it will transfer particles and cause rust.
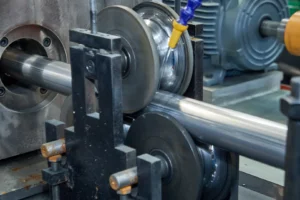
How Do You Initiate the TIG Orbital Welding Process?
Starting the weld incorrectly can cause a bad arc strike. This can damage the tungsten electrode and the pipe, forcing you to stop and start over. Our modern orbital welders automate this for a perfect start.
To initiate the process, you perform a final check of the alignment and then press the start button on the control unit. The system automatically begins a gas pre-purge, strikes the arc, and commences the pre-programmed 360-degree orbital weld.

The Automated Welding Sequence
Once the pipe is prepped and the machine is set up, the magic happens with the push of a button. Our XZS machines are designed with intelligent control systems that manage the entire initiation sequence flawlessly. This automation is what drives the incredible consistency and quality that manual welding simply cannot match. It’s a core reason why our clients in high-performance sectors see such a dramatic reduction in defect rates.
1. The Pre-Purge Cycle
Before the arc ignites, the machine automatically floods the weld head and the inside of the pipe with argon gas. This "pre-purge" cycle pushes all the oxygen out of the weld zone. Oxygen is the enemy of a good stainless steel weld; it causes oxidation and a weak, brittle joint.
2. Automated Arc Ignition
Our welders use a high-frequency, non-contact arc start. The machine creates the arc without the tungsten electrode ever touching the pipe. This prevents contamination of both the electrode and the workpiece, ensuring a pure weld from the very first moment.
3. The Welding Pass
With the arc established, the weld head begins its smooth, consistent rotation around the pipe. The PLC controller manages every variable in real-time—from the current and voltage to the travel speed—to execute the pre-programmed weld schedule perfectly. This level of control is simply impossible to achieve by hand.
Can You Monitor and Adjust Welding Parameters During the Process?
Every batch of material can have slight variations. Ignoring this can lead to inconsistent weld penetration across a production run. Advanced systems allow real-time monitoring and tuning for absolute consistency.
Yes, our advanced PLC and touch-screen interfaces allow operators to monitor key parameters like amperage and travel speed in real-time. Minor adjustments can be made mid-weld to fine-tune the weld bead for perfect, consistent results on every pipe.

Data-Driven Welding for Industry 4.0
The ability to monitor and adjust on the fly is a hallmark of a modern, intelligent welding system. It's a key feature we build into our XZS production lines because we know that in the real world, absolute consistency requires adaptability. This capability is also fundamental to integrating with Industry 4.0, as it allows for data logging, traceability, and quality control. An operator can watch the weld pool and make subtle changes to optimize the outcome based on visual feedback. Here are the core parameters you can control:
| Parameter | What It Controls | Common Adjustment |
|---|---|---|
| Amperage (Current) | The heat input and depth of penetration. | Increase for thicker walls; decrease for thinner walls. |
| Travel Speed | How fast the weld head orbits the pipe. | Slow down for more heat input and a wider bead. |
| Arc Voltage | The distance of the arc / width of the bead. | Increase for a wider, flatter bead profile. |
| Pulse Settings | The pulsing of the current between high and low peaks. | Used to control heat and agitate the weld pool for a finer grain structure. |
This level of control ensures that even with slight variations in material or ambient conditions, the final product remains within specification.
What Are the Final Steps for Inspecting a Welded Stainless Steel Pipe?
A weld might look good but hide internal flaws. An undetected defect can lead to catastrophic failure and damage your reputation. A systematic inspection process ensures every pipe meets the highest standards.
The final steps include a post-weld gas purge to protect the cooling weld, followed by a thorough visual inspection for color, consistency, and defects. For critical applications, non-destructive testing (NDT) is often required to verify internal integrity.
Verifying Weld Integrity
The weld isn't finished until it has been verified. At XZS, quality management is built into our ISO 9001–certified process, and final inspection is a step we take very seriously. A beautiful-looking weld is a good sign, but it needs to be backed by a methodical evaluation.
1. Post-Weld Procedures
Immediately after the arc extinguishes, the machine continues to supply shielding gas for a few seconds. This "post-purge" protects the hot, vulnerable weld bead from the atmosphere as it cools down, preventing oxidation and ensuring optimal corrosion resistance.
2. Visual Inspection Checklist
The first line of defense is a trained eye. We inspect for a few key indicators of a quality weld:
- Uniformity: The bead should have a consistent width and height all the way around the pipe.
- Color: A light straw or blueish tint indicates the correct heat and gas shielding. A dark grey or black color signals excessive heat or contamination.
- Defects: We look for any signs of undercut (a groove melted into the base metal), porosity (small holes), or cracks.
3. Advanced Quality Control
For industries like aerospace, automotive, or food processing, visual inspection isn't enough. Non-destructive testing (NDT) methods like dye penetrant testing or X-ray inspection are used to find any subsurface flaws that aren't visible. This guarantees the weld is as strong on the inside as it looks on the outside.
Заключение
The automatic TIG orbital welder revolutionizes stainless steel pipe fabrication. It delivers unmatched precision, quality, and efficiency through a systematic process. From meticulous setup and preparation to automated welding and rigorous inspection, this technology ensures flawless, repeatable results, making it essential for any modern, high-specification manufacturing operation.